Description
Primitive pottery making is the art of creating vessels from clay using techniques that require minimal technology. This fundamental skill represents one of humanity's earliest technological advancements beyond stone tools, enabling the creation of containers for storing food, water, and other essential resources. Mastering pottery making is a critical step in developing more advanced technologies and improving quality of life in a stone world.
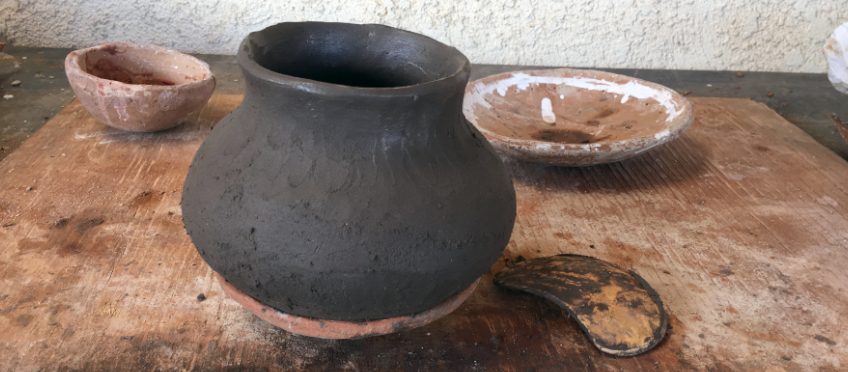
A primitive pot freshly formed using the coil method
Practical Guide to Primitive Pottery Making
Creating pottery from scratch involves several key steps, from finding appropriate clay to firing the finished vessel. This guide will walk you through the entire process using only technologies available in the earliest stages of civilization.
1. Finding and Processing Clay
Clay is abundant in most environments. Look for it near water sources, riverbanks, or areas where the soil has a sticky, plastic quality when wet.
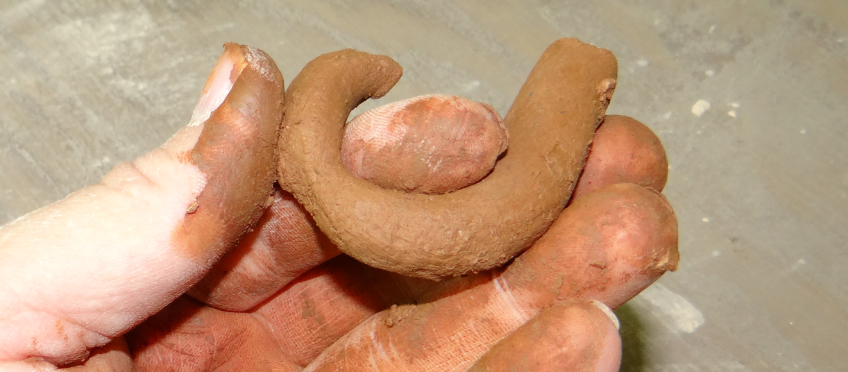
Testing clay plasticity by bending it around a finger
To test if soil contains usable clay, wet a small amount and roll it into a ball. If it holds its shape and can be formed without crumbling, it likely contains clay. For detailed instructions on finding and processing clay, see our Clay Sourcing and Preparation guide.
2. Preparing the Clay
Raw clay must be processed before use:
- Remove stones, roots, and other debris
- Add temper (sand, crushed shells, or ground pottery) at a ratio of 4:1 (clay to temper)
- Mix thoroughly and add water gradually until the clay reaches a workable consistency
- Knead the clay to remove air bubbles and ensure even moisture distribution
3. Forming Techniques
Several methods can be used to form pottery vessels:
Coil Method
The coil method is one of the most versatile and widely used primitive pottery techniques:
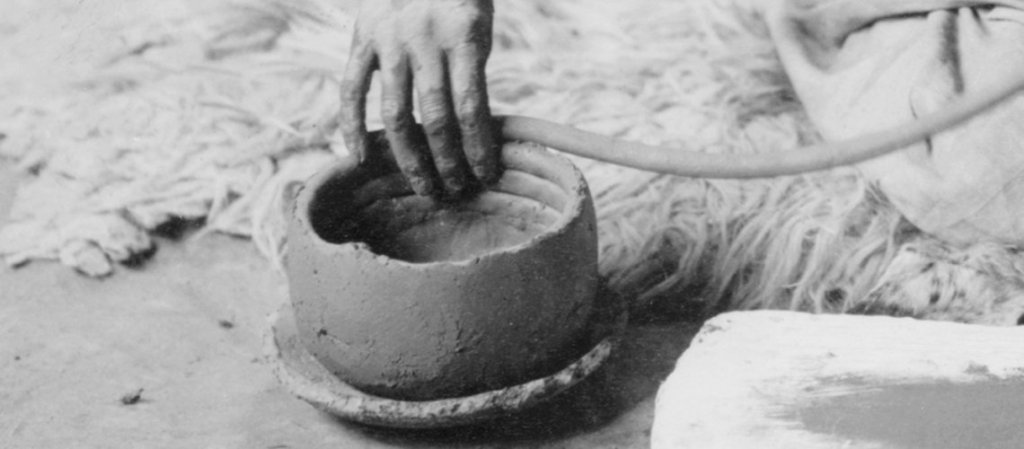
Building a pot using the coil method in a puki support
- Form a flat base by patting out a disk of clay
- Roll clay into long, snake-like coils
- Stack coils in circles on top of the base, pinching them together
- Smooth the inside and outside with fingers or a smooth stone
For detailed instructions on various forming techniques, see our Basic Forming Techniques guide.
4. Drying
Pottery must dry slowly and evenly to prevent cracking:
- Place vessels in a shaded area away from direct sunlight
- Allow to dry for several days, depending on thickness and humidity
- Turn occasionally to ensure even drying
For more information on proper drying techniques, see our Drying and Finishing guide.
5. Firing
The final step transforms clay into durable ceramic:
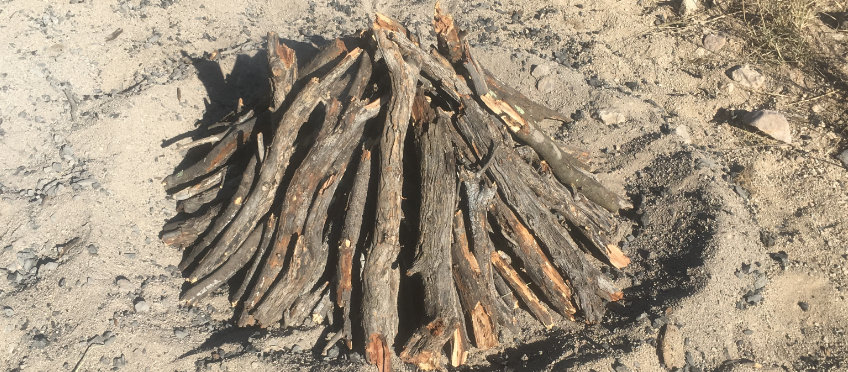
Pottery arranged in a teepee fire structure ready for firing
- Build a fire and let it burn down to coals
- Place dried pottery vessels near the fire to warm gradually
- Once warm, place vessels on small stones over the coals
- Build a teepee structure of fuel around and over the pottery
- Light the structure and allow it to burn completely
- Let the pottery cool naturally before handling
For detailed firing instructions, see our Primitive Firing Methods guide.
Troubleshooting Common Issues
Cracking During Drying
Cause: Uneven drying, insufficient temper, or walls of uneven thickness
Solution: Add more temper to your clay, ensure even wall thickness, and dry more slowly
Breaking During Firing
Cause: Residual moisture in the clay or rapid temperature changes
Solution: Ensure pottery is completely dry before firing and warm gradually before full firing
Weak or Crumbly Pottery
Cause: Insufficient firing temperature or duration
Solution: Use more fuel and ensure the fire reaches high temperatures