Basic Forming Techniques
Prerequisites:
Parent Technology:
Description
Before the invention of the pottery wheel, all pottery was created using hand-building techniques. These methods have been used for thousands of years across virtually every culture and continue to be fundamental to pottery making today. This guide covers the basic forming techniques for creating pottery vessels without mechanical assistance, using only your hands and simple tools that would be available in a stone age environment.
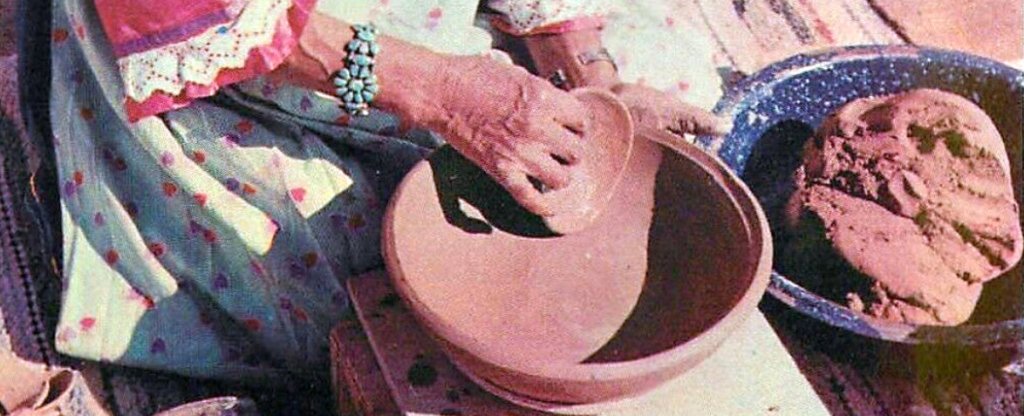
Traditional coil pottery technique being demonstrated
Pinch Pot Technique
Description
The pinch pot is the most basic and ancient pottery forming technique. It requires no tools other than your hands and can be used to create small to medium-sized vessels. This technique is perfect for beginners and provides an excellent foundation for understanding how clay behaves.
Step-by-Step Process
- Prepare the Clay: Begin with a ball of well-kneaded clay about the size of your fist or slightly larger.
- Form the Base: Hold the clay ball in one hand and use the thumb of your other hand to press into the center of the ball, stopping about 1/2 inch (1.25 cm) from the bottom.
- Begin Pinching: While slowly rotating the clay, use your thumb inside and fingers outside to pinch the clay between them, gradually thinning the walls.
- Maintain Even Thickness: Work methodically around the pot, keeping the wall thickness consistent (about 1/4 to 3/8 inch or 0.6-1 cm is ideal).
- Shape the Form: As you pinch and rotate, gradually shape the clay into your desired form—whether a bowl, cup, or other vessel.
- Refine the Rim: Once the basic form is established, smooth and even out the rim using your fingers or a damp piece of leather or cloth.
- Smooth the Surface: Use your fingers, a smooth stone, or a piece of gourd to smooth both the interior and exterior surfaces.
Tips for Success
- Keep your hands slightly damp but not wet to prevent the clay from sticking.
- Work slowly and methodically to maintain even wall thickness.
- If the clay begins to dry or crack during forming, cover it with a damp cloth and let it rest before continuing.
- For larger vessels, multiple pinch pots can be joined together.
Coil Building Technique
Description
Coil building is one of the most versatile hand-building techniques, allowing for the creation of vessels of virtually any size and shape. It involves stacking and joining rolls (coils) of clay to build up the walls of a vessel.
Step-by-Step Process
- Create a Base: Begin by forming a flat circular base from a ball of clay. You can either:
- Pat a ball of clay between your hands to form a disk
- Roll out a slab and cut a circular base
- Prepare Coils: Roll out coils of clay between your hands or on a flat surface. For beginners, coils about the thickness of your finger work well. More experienced potters may use thinner coils.
- Use even pressure when rolling to ensure consistent thickness
- Make coils long enough to form complete rings for your vessel
- Score and Slip: Before attaching each coil, roughen both surfaces to be joined (scoring) and apply a thin layer of watery clay (slip) to help them bond.
- Attach the First Coil: Place your first coil around the perimeter of the base, pressing gently to secure it.
- Bond the Coil: Use your fingers to blend the coil to the base, working from both inside and outside. The "bonding pinch" is crucial—use your index finger on the outside to press down and slightly into the body while supporting with fingers on the inside.
- Continue Adding Coils: Add subsequent coils one at a time, scoring, slipping, and bonding each one before adding the next.
- Shape the Vessel: As you build up, use your hands to shape the vessel:
- For straight walls, keep coils directly above one another
- For outward flaring, place coils slightly outside the previous ones
- For inward tapering, place coils slightly inside the previous ones
- Smooth the Surface: Once the desired height is reached, use a wooden or stone tool to smooth both the interior and exterior surfaces, blending the coils together.
Tips for Success
- Keep coils at a consistent thickness for even drying and firing.
- Don't add too many coils at once—build up gradually to prevent collapse.
- If the vessel becomes too soft to support more coils, let it firm up slightly before continuing.
- Use a "puki" (support form) to help maintain the shape while building larger vessels.
- Periodically check wall thickness with your fingers and thin areas that are too thick using the "flat pinch" technique.
Slab Construction Technique
Description
Slab construction involves creating flat sheets of clay and joining them to form vessels. This technique is excellent for creating angular forms and can be combined with coil and pinch techniques for more complex shapes.
Step-by-Step Process
- Prepare Clay Slabs: Form slabs by:
- Patting clay between your hands to form a flat disk
- Pressing clay flat with a smooth stone or wooden paddle
- For more even slabs, roll the clay between two guides of equal thickness (like sticks)
- Cut Shapes: Once you have a slab of even thickness (about 1/4 to 3/8 inch or 0.6-1 cm), cut out the shapes needed for your vessel using a sharp stone or bone tool.
- Allow Partial Drying: Let the slabs firm up slightly until they're leather-hard enough to hold their shape but still pliable.
- Score and Slip: Before joining slabs, score (roughen) the edges to be joined and apply slip (watery clay).
- Join the Slabs: Press the edges firmly together, supporting both sides to prevent distortion.
- Reinforce Joints: Add small coils of clay along the interior seams and smooth them into the joints for extra strength.
- Smooth and Refine: Use your fingers, a smooth stone, or a wooden tool to smooth joints and surfaces.
Tips for Success
- Ensure slabs are of even thickness to prevent cracking during drying and firing.
- When joining slabs at angles, support the structure until it's firm enough to hold its shape.
- For cylindrical forms, wrap a slab around a form (like a smooth log) to create the curve, then remove once it's firm enough.
- Work on a textured surface (like woven grass) to prevent slabs from sticking.
Combination Techniques
Pinch and Coil
Start with a pinch pot base and add coils to increase height. This is particularly useful for creating larger vessels with stable bases.
Coil and Slab
Use slabs for bases and flat surfaces, with coils to build up walls or create transitions between sections.
Paddle and Anvil
After forming a basic shape with any technique, use a wooden paddle on the outside and support with your hand or a smooth stone "anvil" on the inside to refine the shape and compress the clay.
Essential Forming Tools
While pottery can be made with just your hands, these simple tools can greatly improve your results:
- Smooth Stones: For burnishing and smoothing surfaces
- Wooden Paddles: Made from flat pieces of wood, used for shaping and compressing
- Ribs: Made from gourd pieces, bone, or wood, used for smoothing and shaping
- Scrapers: Made from shell, bone, or wood, used for removing excess clay and evening surfaces
- Pointed Tools: Made from bone, wood, or thorns, used for incising decorations
- Puki: A support form (often a shallow bowl) used to stabilize the base while building
Common Challenges and Solutions
Uneven Wall Thickness
Solution: Regularly check thickness with your fingers and thin thicker areas using pinching or scraping techniques.
Cracking During Construction
Solution: Keep clay at a consistent moisture level by covering with damp cloth when not actively working on it.
Poor Joints Between Coils or Slabs
Solution: Always score and slip joining surfaces, and thoroughly blend the joints from both sides.
Collapsing Walls
Solution: Build gradually, allowing lower sections to firm up before adding more height. Use supports when necessary.
Base Cracking
Solution: Ensure the base is thick enough (at least 3/8 inch or 1 cm) and compress it well to remove air pockets.
Next Steps
Once you've formed your pottery using these techniques, proceed to:
- Drying and Finishing - Properly drying and decorating your pottery
- Primitive Firing Methods - Techniques for firing pottery without a modern kiln