Primitive Firing Methods
Prerequisites:
Parent Technology:
Description
Firing is the crucial final step in pottery making that transforms soft clay into durable ceramic. Without modern kilns, our ancestors developed ingenious methods to achieve the high temperatures needed for this transformation using only the most basic resources. This guide covers practical primitive firing techniques that can be implemented using only materials and knowledge available in a stone age environment.
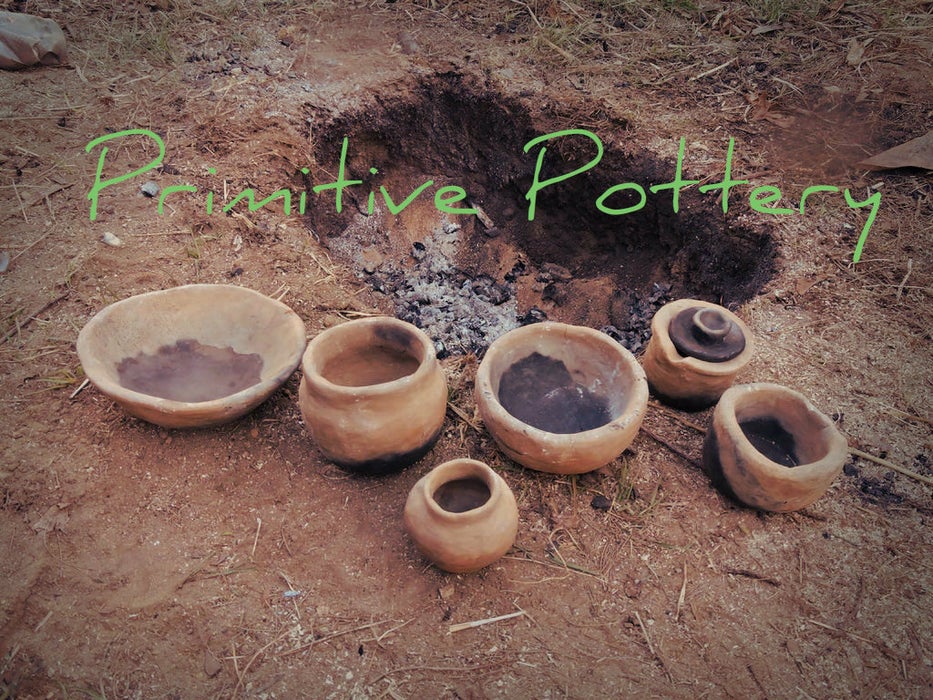
Primitive pottery firing pit with finished vessels
Understanding the Firing Process
What Happens During Firing
During firing, several critical chemical and physical changes occur in the clay:
- Water Removal: Any remaining physical water evaporates (up to about 300°C/570°F)
- Chemical Water Removal: Chemically bound water is driven off (between 300-600°C/570-1112°F)
- Organic Material Burning: Any organic material in the clay burns away
- Sintering: Clay particles begin to fuse together (starting around 700°C/1292°F)
- Vitrification: Clay begins to partially melt and form glass-like bonds (900°C/1652°F and above)
Temperature Requirements
Primitive firing methods typically reach temperatures between 700-950°C (1292-1742°F). While this is lower than modern kiln temperatures, it's sufficient to create durable pottery for everyday use. The exact temperature needed depends on:
- The type of clay used
- The thickness of the pottery
- The intended use of the finished pieces
Pit Firing Method
Description
Pit firing is one of the oldest and most reliable primitive firing methods. It involves creating a shallow pit in which pottery is fired using a carefully built fire. This method provides better insulation and temperature control than open firing.

Prepared pit for primitive pottery firing with insulating base
Step-by-Step Process
- Prepare the Pit:
- Dig a circular or oval pit approximately 1 foot (30 cm) deep and 2-3 feet (60-90 cm) in diameter
- The pit should be in a location protected from strong winds
- If possible, line the bottom with flat stones or a layer of sand for insulation
- Prepare the Pottery:
- Ensure all pottery is completely dry (no moisture remaining)
- Pre-warm the pottery by placing it near (but not in) a small fire for several hours
- Inspect for any cracks that might cause failure during firing
- Create a Fuel Bed:
- Place a layer of small, dry sticks and twigs in the bottom of the pit
- Add a layer of dry grass, leaves, or other fine combustible material
- This initial fuel bed should be about 2-3 inches (5-8 cm) thick
- Position the Pottery:
- Carefully place your pottery pieces on the fuel bed
- Leave space between pieces to allow for heat circulation
- Avoid having pieces touch each other
- For larger vessels, you may need to support them with small stones
- Add Combustible Material:
- Cover the pottery with another layer of dry grass, leaves, or small twigs
- This layer should completely cover all pottery pieces
- For colored effects, add materials like seaweed, salt, copper compounds, or iron oxides
- Build the Main Fuel Layer:
- Add larger sticks and small logs in a teepee or crosshatch pattern
- Build up the fuel to at least 1 foot (30 cm) above the pit
- Use hardwoods if available, as they burn hotter and longer
- Light the Fire:
- Light the fire from multiple points around the perimeter
- Allow the fire to catch and spread naturally
- Avoid poking or disturbing the fire once it's established
- Maintain the Fire:
- Add additional fuel as needed to maintain a strong fire
- Continue adding fuel for 2-3 hours to reach maximum temperature
- The fire should be hot enough that approaching closer than 3-4 feet (1-1.2 m) is uncomfortable
- Allow to Burn Down:
- After maintaining peak temperature for 2-3 hours, stop adding fuel
- Let the fire burn down naturally
- Do not disturb the coals or pottery
- Cooling Period:
- Allow everything to cool completely (at least 8-12 hours, preferably overnight)
- Resist the temptation to check the pottery early
- Rapid cooling can cause thermal shock and breakage
- Retrieving the Pottery:
- Once completely cool, carefully remove the ash and charcoal
- Gently extract each piece of pottery
- Brush off excess ash with a soft brush or cloth
Tips for Success
- Choose a day with minimal wind to prevent uneven heating
- The slower the heating and cooling, the less likely pottery will crack
- Expect some pieces to break—this is normal even with experienced potters
- The color of your pottery will be influenced by the clay composition, firing temperature, and atmosphere (oxidizing or reducing)
Bonfire Firing Method
Description
Bonfire firing is the simplest method, requiring no pit preparation. While it offers less temperature control than pit firing, it's quicker to set up and can still produce functional pottery.
Step-by-Step Process
- Select and Prepare the Site:
- Choose a flat area away from flammable materials
- Clear a circular area approximately 4-5 feet (1.2-1.5 m) in diameter
- If possible, create a ring of stones to help contain the fire
- Create a Fuel Base:
- Lay down a bed of small sticks in a circular pattern
- Add a layer of dry grass or leaves
- Position the Pottery:
- Place completely dry pottery pieces on the fuel base
- Keep pieces separated from each other
- Cover with Fuel:
- Carefully cover the pottery with more dry grass and small sticks
- Build up larger sticks and small logs around and over the pottery
- Create a dome-like structure of fuel that completely covers the pottery
- Light and Maintain the Fire:
- Light the fire from multiple points
- Allow it to burn vigorously for 1-2 hours
- Add additional fuel as needed to maintain high heat
- Cool Down:
- Let the fire burn down naturally
- Allow everything to cool completely (at least 8 hours)
- Retrieve the pottery only when completely cool
Trench Firing Method
Description
Trench firing is a variation that works well on hillsides or when you want to take advantage of natural drafts to increase temperature.
Step-by-Step Process
- Dig the Trench:
- Dig a trench approximately 1 foot (30 cm) deep, 1-2 feet (30-60 cm) wide, and 3-4 feet (90-120 cm) long
- If possible, orient the trench so that prevailing winds blow along its length
- On a hillside, dig the trench running uphill to create a natural chimney effect
- Prepare and Position:
- Follow the same preparation steps as for pit firing
- Place pottery in the center of the trench
- Build the fuel around and over the pottery
- Fire and Cool:
- Light the fire at the downwind or downhill end
- The draft will help the fire burn hotter
- Follow the same firing and cooling procedures as for pit firing
Creating Different Firing Effects
Oxidation Firing
Oxidation firing occurs when there's plenty of oxygen during the firing process:
- Results in brighter, clearer colors
- Iron-bearing clays will turn reddish-orange
- Achieved by ensuring good airflow throughout the firing
Reduction Firing
Reduction firing occurs when oxygen is limited during part of the firing:
- Creates darker, often black or gray pottery
- Achieved by adding materials like fresh leaves, grass, or dung after the fire is well-established
- The smoke and carbon produced penetrate the clay, creating the dark coloration
Creating Surface Patterns
Various materials can be used to create patterns and colors:
- Salt: Creates orange or yellow speckles
- Copper compounds: Can produce greens and blues
- Iron oxides: Create reds and browns
- Seaweed: Can produce interesting patterns and colors
- Banana peels or other organic materials: Create carbon patterns
Apply these materials directly to the pottery surface before firing, or place them strategically in the firing environment.
Common Challenges and Solutions
Pottery Breaking During Firing
Solutions:
- Ensure pottery is completely dry before firing
- Pre-warm pottery gradually before placing in the main fire
- Add more temper (sand or grit) to your clay body
- Make vessel walls more uniform in thickness
- Heat and cool more slowly
Insufficient Firing Temperature
Solutions:
- Use drier, denser hardwoods for fuel
- Improve insulation around the firing area
- Create better draft conditions
- Maintain the fire for a longer period
- Use smaller pottery pieces that heat more thoroughly
Uneven Firing
Solutions:
- Position pottery more carefully in the firing area
- Arrange fuel more evenly
- Shield the firing area from wind
- Rotate pieces halfway through firing (if possible)
Smoke Damage
Solutions:
- If unwanted, ensure better oxygen flow during firing
- If desired (for black pottery), intentionally create a reducing atmosphere
Testing Firing Success
After firing and cooling, test your pottery to determine if it was fired successfully:
- Sound Test: Tap the pottery with a wooden stick—properly fired pottery produces a clear, ringing sound rather than a dull thud
- Water Test: Place a small amount of water inside the vessel—properly fired pottery will hold water without becoming soft or disintegrating
- Hardness Test: Try to scratch the surface with your fingernail—properly fired pottery cannot be scratched
Safety Considerations
- Always maintain a clear area around your firing site free of flammable materials
- Have water or sand available to control unexpected fire spread
- Never leave a firing unattended
- Be aware of wind direction and strength
- Protect your eyes from smoke and your hands from heat
- Allow pottery to cool completely before handling
Next Steps
After successfully firing your pottery, you can:
- Apply natural sealants like beeswax or plant resins to make vessels more water-resistant
- Create more complex forms as your skills improve
- Experiment with different clays, tempers, and firing techniques
- Begin exploring more advanced technologies that build upon pottery making