Drying and Finishing Primitive Pottery
Parent Technology:
Description
After forming your pottery vessel, proper drying and finishing are critical steps that determine the final quality and durability of your piece. These processes prepare the clay for firing and can significantly enhance both the appearance and functionality of your pottery. This guide covers the essential techniques for drying and finishing pottery using only materials and methods available in a stone age environment.
Proper Drying Techniques
Why Proper Drying Matters
Proper drying is crucial for preventing cracks and ensuring your pottery survives the firing process. Clay that dries too quickly or unevenly will develop stress cracks that may cause the piece to fail during firing.
Step-by-Step Drying Process
- Initial Setting: After forming your vessel, let it sit undisturbed for several hours until it's firm enough to hold its shape but still damp (often called "cheese-hard").
- Even Drying Environment: Place your pottery in a location with consistent temperature and humidity, away from direct sunlight or drafts. Ideal conditions are:
- Shaded area with good air circulation
- Temperature between 60-75°F (15-24°C)
- Moderate humidity (40-60%)
- Slow Drying: Cover your pottery with a damp cloth or leaves, gradually uncovering more of the piece over several days to control the drying rate.
- Rotate Regularly: Turn your pottery every few hours during the first day, then daily after that to ensure even drying on all sides.
- Special Care for Thick Areas: Areas where clay is thicker (like bases and handles) need to dry more slowly. Keep these areas covered longer than thinner sections.
- Complete Drying: Allow your pottery to dry completely before firing—this typically takes 1-3 weeks depending on climate, vessel thickness, and clay composition. The pottery should be room temperature and completely white or light-colored when dry.
Testing for Dryness
To test if your pottery is completely dry:
- Touch the pottery to your cheek or the back of your hand—it should feel room temperature, not cool
- The color should be uniform and significantly lighter than when wet
- Tap the pottery gently—it should produce a clear, high-pitched sound rather than a dull thud
Surface Finishing Techniques
Smoothing
Smoothing is best done when the clay is still somewhat plastic but firm enough to hold its shape (leather-hard stage):
- Use a smooth stone, bone, or wooden tool to gently compress and smooth the surface
- Work in small sections, using consistent pressure
- Keep the surface slightly damp by occasionally misting with water or applying with damp fingers
- Pay special attention to joints between coils or slabs
Burnishing
Burnishing creates a polished, lustrous surface and helps make the pottery more water-resistant:
- Wait until the pottery is almost completely dry but still has a slight coolness to the touch
- Use a smooth, hard object like a polished stone, bone, or seed
- Rub the surface in small, overlapping circular motions with firm pressure
- Continue until the surface develops a sheen
- For higher polish, repeat the process several times, allowing the surface to dry slightly between sessions
Texturing
Adding texture can enhance both the appearance and grip of your pottery:
- Cord Marking: Press twisted plant fibers or cords into the damp clay surface
- Paddle Marking: Use a wooden paddle wrapped with cord or carved with patterns
- Finger Impressions: Create regular patterns using fingertips or fingernails
- Combing: Drag a serrated tool (like a bone or wooden comb) across the surface
- Stamping: Press carved objects (shells, seeds, carved sticks) into the clay
Surface Treatments
Slip Application
Slip is a liquid clay mixture that can be applied to pottery before firing to change its color or texture:
- Prepare Slip: Mix clay with water to create a cream-like consistency
- Apply When Leather-Hard: Apply slip when the pottery is leather-hard (firm but still damp)
- Application Methods:
- Dipping: Immerse the entire piece or part of it in the slip
- Brushing: Apply with a brush made from animal hair or plant fibers
- Pouring: Pour slip over the pottery while rotating it
- Allow to Dry: Let the slip dry completely before firing
Engobe
Engobe is a slip with added minerals for color variation:
- Prepare slip as above
- Add colored minerals (ochre, iron oxide, manganese dioxide) for desired color
- Mix thoroughly and apply as you would slip
Incising and Carving
Create decorative patterns by removing clay from the surface:
- Wait until the clay is leather-hard
- Use a sharp tool (bone, stone, or wooden point) to cut into the surface
- Create patterns, images, or symbols
- Smooth any rough edges with a damp finger
Pre-Firing Preparation
Final Inspection
Before firing, carefully inspect your pottery for:
- Cracks or weak spots that need repair
- Uneven thickness that might cause problems during firing
- Complete dryness throughout the piece
Repairing Minor Defects
If you find small cracks or imperfections:
- Make a paste of dry clay powder and water
- Slightly dampen the area to be repaired
- Fill the crack or defect with the paste
- Smooth the surface and allow to dry completely
Pre-Heating
Before the main firing, it's beneficial to gradually warm your pottery:
- Place your completely dry pottery near (but not in) your fire pit
- Allow it to warm gradually for several hours
- Turn occasionally to ensure even warming
- This step helps drive out any remaining moisture and reduces the risk of thermal shock during firing
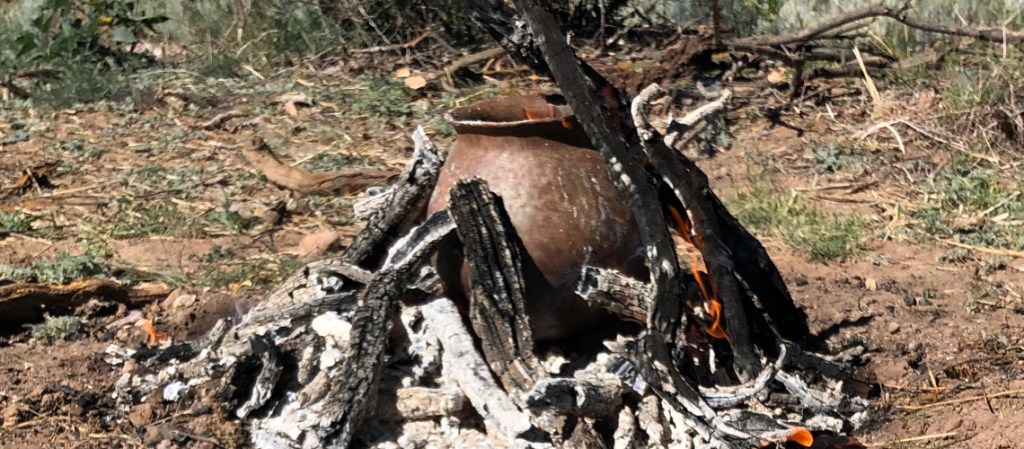
Primitive pottery being fired in an open fire
Common Challenges and Solutions
Cracking During Drying
Solution: Slow down the drying process by covering the pottery with damp cloth and uncovering gradually. Ensure even wall thickness during forming.
Warping
Solution: Support pottery during drying, especially if it has an irregular shape. Rotate regularly to ensure even drying on all sides.
Poor Surface Finish
Solution: Timing is crucial—smoothing and burnishing must be done when the clay is at the right moisture level. Practice to learn the optimal timing for your specific clay.
Slip Flaking Off
Solution: Apply slip when the pottery is still somewhat damp (leather-hard), not completely dry. Ensure the slip isn't too thick.
Uneven Color After Drying
Solution: This is normal and will typically even out during firing. If concerned, apply an even layer of slip to unify the appearance.
Testing Clay Dryness
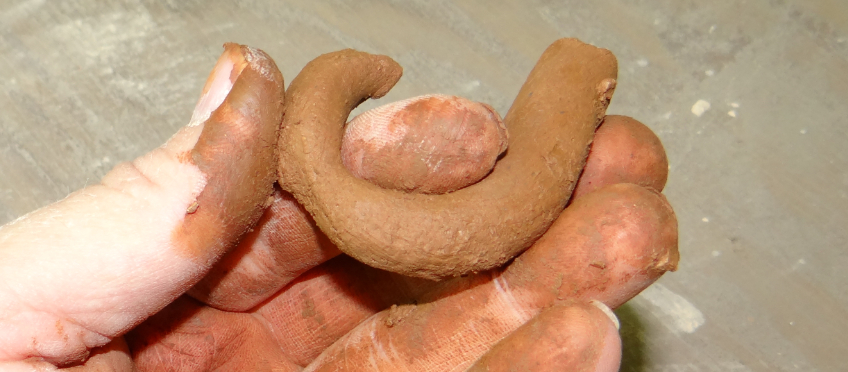
Testing clay plasticity - clay should be completely dry before firing
The image above shows a plasticity test for clay. When preparing for firing, your pottery should be completely dry - unlike the plastic clay shown here which is still workable. Dry clay will be lighter in color, room temperature to the touch, and make a clear ringing sound when tapped.
Next Steps
Once your pottery is properly dried and finished, proceed to:
- Primitive Firing Methods - Techniques for firing pottery without a modern kiln