Description
Metal smelting is the process of extracting metals from their ores through the application of heat and chemical reducing agents. This fundamental technology marks the transition from stone tools to metal tools, representing one of the most significant technological leaps in human history. This guide covers primitive metal smelting techniques that can be accomplished with technology available after mastering pottery making and mechanical weathering.

A primitive copper smelting operation using a clay furnace
Practical Guide to Metal Smelting
1. Understanding Metal Ores
Before attempting to smelt metal, you must be able to identify and collect appropriate ores:
- Copper: Look for green or blue-green minerals (malachite, azurite) or reddish rocks with green patches. These are often found in weathered outcrops where copper deposits have been exposed to air and water.
- Tin: Search for heavy black or brown stones (cassiterite) that are often found in stream beds as rounded pebbles. When scratched, cassiterite produces a white to brownish streak.
- Lead: Identify by heavy, dull gray rocks (galena) that often have a cubic crystalline structure and metallic luster. Galena is remarkably heavy for its size and produces a dark gray streak when scratched.
For detailed information on copper mining and extraction, see our Copper Mining & Extraction guide.
2. Building a Basic Smelting Furnace
A primitive but effective smelting furnace can be constructed using materials available after mastering pottery making:
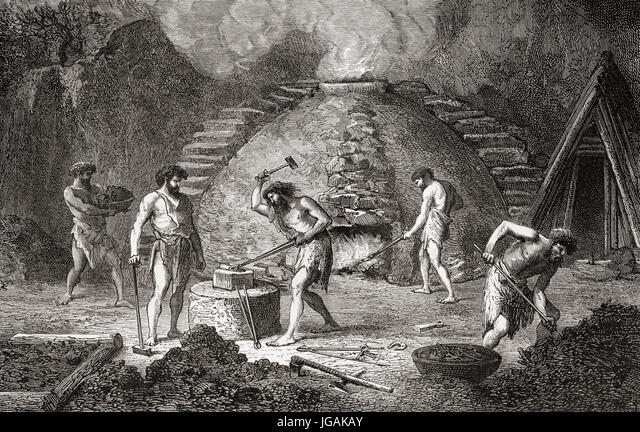
Historical illustration of workers operating a primitive smelting furnace
Materials Needed:
- Clay soil (ideally with some sand content for thermal resistance)
- Stones for foundation and support
- Dried grass or straw for clay reinforcement
- Charcoal (produced from hardwood using techniques from fire making)
- Tuyere (clay pipe) for air introduction
Construction Steps:
- Dig the Pit: Excavate a circular pit approximately 30-40 cm in diameter and 20-30 cm deep. The limited space concentrates heat while minimizing fuel requirements.
- Create the Foundation: Line the bottom of the pit with flat stones to provide a stable base and improve heat retention.
- Build the Walls: Mix clay with chopped straw and water to create a thick paste. Build up the walls of the furnace around the pit to a height of 40-50 cm, leaving an opening at the bottom for the tuyere (air pipe) and another at the top for adding fuel and ore.
- Install the Tuyere: Create a clay pipe approximately 20-30 cm long and 3-5 cm in diameter. Position it at a downward angle (approximately 30-45 degrees) through the furnace wall near the bottom.
- Dry and Fire: Allow the clay structure to dry completely (1-2 days in warm weather), then fire it gradually by building a small fire inside and slowly increasing the temperature over several hours to prevent cracking.
For more detailed instructions on furnace construction variations, see our Furnace Construction Techniques guide.
3. Creating an Air Supply System
Achieving the necessary temperatures for smelting (1000-1200°C for copper) requires a consistent air supply to intensify the heat of the charcoal fire:
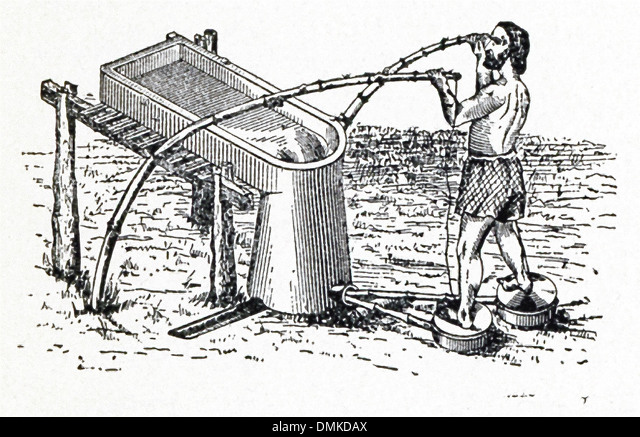
Historical illustration of a primitive bellows system for metallurgy
Option 1: Primitive Bag Bellows
- Materials: Animal hide (preferably goat or deer), wooden frames, leather strips for binding, clay or wooden nozzle
- Construction:
- Clean and tan the hide using techniques from leather working
- Cut two circular pieces of wood slightly smaller than the intended bellows size
- Stretch the hide around the wooden frames and secure with leather strips
- Install a one-way valve using a small flap of leather
- Attach a nozzle that connects to the tuyere
- Operation: Requires two people alternating compression of the bellows to maintain constant airflow
Option 2: Foot-Powered Bellows
- Materials: Hollowed log or clay cylinder, leather membrane, wooden lever system
- Construction: Create a sealed chamber with a flexible membrane that can be depressed using foot pressure on a lever
- Operation: Can be operated by a single person using foot pressure while tending the furnace
For detailed instructions on constructing various bellows systems, see our Bellows Construction guide.
4. Preparing the Ore
Proper ore preparation significantly improves smelting efficiency:
Beneficiation Process:
- Crushing: Break ore into small pieces (pea to marble sized) using stone hammers on a stone anvil
- Sorting: Separate high-quality ore pieces (those with more visible mineral content) from waste rock
- Washing: For some ores, washing with water can help remove soil and concentrate the mineral content
- Roasting (optional): For sulfide ores, a preliminary roasting in an open fire can convert sulfides to oxides, making them easier to smelt
Flux Addition:
Adding appropriate flux materials helps separate metal from impurities:
- For copper: Iron oxide (rust, red ochre) or manganese dioxide (black mineral)
- For tin: Limestone or crushed seashells
- For lead: Charcoal ash or limestone
5. The Smelting Process
Follow these steps for a successful primitive smelting operation:
Preparation:
- Ensure the furnace is completely dry and any previous slag has been removed
- Prepare sufficient charcoal (approximately 3-4 times the volume of ore)
- Have your bellows system ready and tested
- Organize your crushed ore and flux materials
Smelting Procedure:
- Preheating: Fill the furnace with charcoal and ignite it, using the bellows to raise the temperature gradually over 30-45 minutes
- Charging: When the charcoal is glowing bright orange-red, add a layer of crushed ore mixed with flux material (approximately 1 part ore to 3 parts charcoal)
- Maintaining Heat: Continue operating the bellows at a steady rhythm to maintain high temperature (the flame should appear bright yellow to white)
- Adding Layers: As the charge begins to melt and settle, add additional layers of charcoal and ore mixture
- Monitoring: Watch for color changes in the flame - green or blue flames often indicate copper volatilization, while a clear yellow-white flame suggests proper temperature
- Duration: Maintain the smelting process for 2-4 hours, depending on ore quality and furnace efficiency
Completion Indicators:
- The charge has visibly settled and compacted
- Slag appears fluid and glassy when probed with a stick
- Flame color stabilizes without mineral-specific colors
6. Extracting the Metal
After the smelting process is complete:
Immediate Extraction:
- Allow the furnace to cool slightly (30-60 minutes) but not completely
- Break open the front of the furnace carefully
- Extract the slag and metal mixture using tongs made from green wood or stone tools
- Place the hot material on a stone surface to cool further
Complete Cooling Method:
- Allow the furnace to cool completely (overnight)
- Dismantle the furnace structure carefully
- Separate the metal from slag by breaking apart the cooled mass
- Collect all metal pieces, which will typically be found at the bottom of the furnace
Metal Processing:
- Slag Removal: Break away any attached slag using stone hammers
- Consolidation: If multiple small pieces of metal are produced, they can be consolidated by reheating in a smaller crucible
- Initial Forming: While still hot, the metal can be hammered into rough ingot shapes using stone hammers on a stone anvil
7. Troubleshooting Common Problems
Even with careful preparation, smelting operations can encounter various issues:
Insufficient Temperature:
- Symptoms: Ore doesn't melt, charcoal burns slowly, no visible slag formation
- Solutions:
- Improve bellows operation (faster rhythm or multiple operators)
- Check for air leaks in the tuyere connection
- Reduce furnace diameter to concentrate heat
- Use drier, higher-quality charcoal
Furnace Damage:
- Symptoms: Cracks forming in furnace walls, collapse of structure
- Solutions:
- Add more temper (sand, crushed pottery) to clay mixture
- Dry and pre-fire furnace more gradually
- Reinforce exterior with stones or additional clay layers
Poor Metal Recovery:
- Symptoms: Little metal produced despite good ore quality
- Solutions:
- Crush ore to smaller, more consistent size
- Add appropriate flux materials
- Extend smelting duration
- Consider pre-roasting sulfide ores
Excessive Fuel Consumption:
- Symptoms: Charcoal burns quickly without achieving proper temperature
- Solutions:
- Reduce air input slightly
- Use larger charcoal pieces at the bottom of the furnace
- Improve furnace insulation with additional clay layers
8. Metal-Specific Smelting Considerations
Copper Smelting:
- Temperature Required: 1000-1200°C
- Ideal Ores: Malachite, azurite, cuprite (oxide ores are easier than sulfides)
- Special Considerations:
- Green-blue flame indicates copper volatilization (temperature too high)
- Copper often forms small prills (droplets) throughout the slag rather than a single mass
- Multiple smeltings may be needed to refine the metal
Tin Smelting:
- Temperature Required: 800-1000°C (lower than copper)
- Ideal Ores: Cassiterite (tin oxide)
- Special Considerations:
- Tin has a lower melting point and can be lost through volatilization if temperature is too high
- Limestone flux is particularly important for tin smelting
- Tin often forms a distinct layer at the bottom of the furnace
Lead Smelting:
- Temperature Required: 600-800°C (lowest of common metals)
- Ideal Ores: Galena (lead sulfide)
- Special Considerations:
- Lead can be smelted in a simple wood fire without bellows, though results improve with proper furnace
- Lead vapors are highly toxic - always work in well-ventilated areas
- Lead forms distinct pools at the bottom of the furnace
For detailed guides on smelting specific metals, see our specialized guides: