Description
Metal forging is the fundamental art and science of shaping metal through controlled heating and the application of compressive forces, typically using a hammer and anvil. This ancient craft, dating back to the earliest days of metalworking, represents a critical advancement beyond simple casting. Forging allows for the refinement of the metal's internal grain structure, resulting in tools, weapons, and components that are significantly stronger, tougher, and more durable than their cast counterparts. Mastering forging techniques unlocks the ability to create complex shapes, sharp edges, and resilient structures, forming the backbone of advanced toolmaking and mechanical construction.
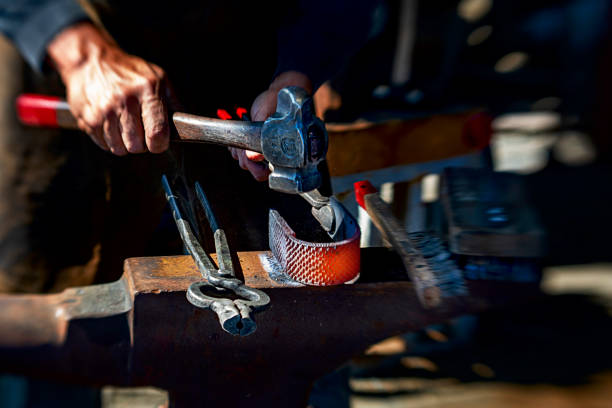
A blacksmith shaping heated metal on an anvil using a hammer.
Practical Guide to Metal Forging
1. Setting Up the Forge and Tools
A functional forge setup is the heart of any blacksmithing operation. The basic components include a hearth to contain the fire, a method for supplying air, an anvil for shaping, hammers for striking, and tongs for holding the hot metal. Initially, a simple ground forge can be constructed by digging a shallow pit and lining it with clay or heat-resistant stones. A tuyere, a pipe made from fired clay or a heat-resistant stone with a hole drilled through it, is inserted into the side of the hearth near the bottom. This pipe connects to bellows, constructed from wood and animal hides, which are used to force air into the fire, significantly increasing its temperature. Charcoal, produced from hardwoods, is the primary fuel source. The anvil, initially a large, flat, hard stone, will eventually be replaced by a shaped iron or steel anvil as metallurgical skills advance. Essential tools include various hammers (different weights and head shapes like flat face and cross-pein), tongs of different sizes and jaw shapes to securely grip various stock sizes, chisels for cutting, and punches for making holes. A nearby water trough is crucial for cooling tools, controlling the temperature of the workpiece, and quenching.
For detailed instructions on building and equipping a primitive forge, see our Forge Setup and Tooling guide.
2. Heating the Metal
Proper heating is critical for successful forging. The metal must be heated to its specific forging temperature range, where it becomes plastic and easily shaped but is not yet hot enough to melt or burn excessively. For wrought iron and simple steels, this temperature is typically judged by color. A bright yellow to almost white heat indicates the correct forging temperature. Learning to read these colors accurately takes practice. The fire must be managed carefully, maintaining a deep bed of hot coals to ensure even heating and minimize oxidation. The metal should be buried within the hottest part of the coals, not resting on top. Avoid prolonged heating, as this can lead to excessive scaling (oxidation) or even burning the metal, which damages its structure. Different metals have different forging ranges, information learned through experimentation and documented in materials science studies.
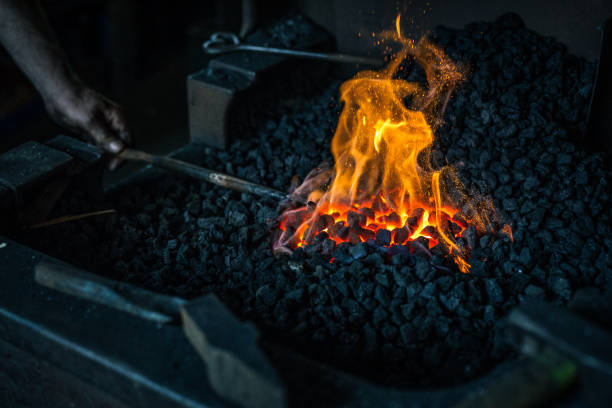
Heating a piece of metal to forging temperature in a charcoal forge.
For detailed guidance on fire management and judging heat, see our Heating Techniques guide.
3. Basic Hammering and Shaping
Once the metal is at the correct temperature, it is quickly moved to the anvil using tongs. Effective hammering requires control, rhythm, and understanding how the hammer blow affects the metal. Use the flat face of the hammer for general flattening and shaping. The pein (the shaped end, often rounded or wedge-like) is used for drawing out or spreading the metal in specific directions. Strike decisively but with control, letting the weight of the hammer do much of the work. The anvil itself is a tool; use its flat face for general work, the horn (the pointed end) for bending curves, and the heel (the square end) for specific shaping tasks. The hardy hole (a square hole in the anvil) holds specialized tools like chisels (hardies) or bending forks. Work quickly while the metal is hot, returning it to the forge for reheating as soon as it cools below the optimal forging temperature (often indicated by a dull red color).
For detailed instructions on hammering skills and using the anvil, see our Hammering and Shaping Fundamentals guide.
4. Drawing Out
Drawing out is the process of increasing the length of a piece of metal while decreasing its cross-sectional area. This is fundamental for making rods, points, blades, and tapering sections. Heat the section to be drawn out to forging temperature. Place the hot metal over the anvil face or the horn. Use the cross-pein of the hammer, striking perpendicular to the desired direction of elongation. Rotate the workpiece regularly (often 90 degrees) between blows to keep the cross-section relatively uniform (e.g., square or round) and prevent excessive spreading in one direction. Work systematically along the section to be drawn out, reheating as necessary. This process refines the grain structure along the length, increasing strength in that direction.
For detailed step-by-step instructions on drawing out techniques, see our Drawing Out Techniques guide.
5. Upsetting
Upsetting is the opposite of drawing out; it involves decreasing the length of a piece while increasing its cross-sectional area. This is used to form heads on bolts or rivets, create thicker sections for strength, or prepare material for punching. Heat the specific section to be upset to a high forging heat (yellow/white). Cool the adjacent areas slightly by dipping them briefly in the water trough to prevent them from deforming. Place the hot end vertically on the anvil and strike the cooler, opposite end with the hammer. Alternatively, hold the bar vertically with tongs and hammer down on the hot end. This compresses the hot section, causing it to bulge outwards. Careful control is needed to ensure the upset is even and occurs only where desired.
For detailed guidance on various upsetting methods, see our Upsetting Techniques guide.
6. Bending
Bending involves shaping the metal into curves or angles. Heat the area to be bent to a uniform forging temperature. Simple bends can be made by hammering the metal over the edge of the anvil face. More complex curves are formed by hammering the metal around the anvil horn. For tighter or more precise bends, specialized bending forks (which fit into the hardy hole) or jigs can be created. Ensure the bend is made smoothly without kinking or cracking the metal. Multiple heats may be required for complex or sharp bends.
For detailed instructions on bending methods and tools, see our Bending Techniques guide.
7. Punching and Drifting
Punching creates holes in hot metal. Heat the area to be punched to a bright yellow heat. Place the metal flat on the anvil face. Position a sharp, tapered punch (made of hardened steel) where the hole is desired. Strike the punch firmly with a hammer. Drive the punch about two-thirds of the way through the metal. Flip the workpiece over, locate the slight bulge created by the punch on the opposite side, and punch from this side to drive out a small slug of metal, completing the hole. This prevents the punch from getting stuck and avoids excessive distortion around the hole. After the initial hole is punched, it can be enlarged or shaped using a drift – a larger, tapered tool hammered through the hole. Drifting requires careful work to avoid splitting the metal.
For detailed step-by-step instructions on punching and drifting, see our Punching and Drifting guide.
8. Forge Welding
Forge welding is the process of joining two pieces of metal by heating them to a near-molten state (welding heat, often sparking white for iron/steel) and hammering them together so they fuse permanently. This requires precise temperature control and cleanliness. The surfaces to be joined are often scarfed (tapered) to increase contact area and help expel flux and scale. Heat both pieces to welding temperature, applying a flux (like sand or borax, once available) just before reaching heat to clean the surfaces and prevent oxidation. Quickly bring the pieces together on the anvil in the correct orientation and hammer them rapidly with light-to-medium blows, starting from the center of the weld and working outwards to force out any trapped flux or scale. The initial blows set the weld, followed by heavier blows to consolidate it. A successful weld is seamless and as strong as the parent metal.
For detailed guidance on achieving reliable forge welds, see our Forge Welding Techniques guide.
9. Cutting
Cutting hot metal is often necessary during forging. A hot cut hardy, a chisel-like tool mounted in the anvil's hardy hole, is commonly used. Heat the metal to forging temperature, place it over the hardy edge, and strike the metal directly above the hardy with a hammer. Rotate the stock and continue striking until it is nearly severed, then break it off by bending. Alternatively, a handheld hot chisel can be used, placing it on the hot metal (supported by the anvil) and striking the chisel with a hammer. Cutting requires careful placement and controlled blows to achieve a clean separation without excessive deformation.
For detailed instructions on various cutting methods, see our Cutting Techniques guide.
10. Finishing
After the primary shaping is complete, finishing steps refine the workpiece. This may involve planishing (smoothing the surface with light, rapid hammer blows on a slightly cooler metal), filing (using hand-cut files once available), or grinding (using abrasive stones). Removing scale (the layer of oxide formed during heating) can be done by wire brushing while hot or by pickling in a weak acid (like vinegar) once cool. The final finish depends on the intended use of the object.
For detailed guidance on finishing processes, see our Finishing Techniques guide.
11. Heat Treatment (Hardening and Tempering)
For tools requiring hardness and edge retention (knives, chisels, axes), heat treatment is essential after forging. This typically involves hardening and tempering, processes understood through materials science. Hardening involves heating the steel to a critical temperature (often a cherry red, varying by carbon content) and then rapidly cooling it by quenching in water or oil. This makes the steel very hard but also brittle. Tempering reduces this brittleness while retaining much of the hardness. It involves carefully reheating the hardened steel to a lower temperature (judged by oxide colors forming on a cleaned surface – straw, brown, purple, blue) and then letting it cool. The final tempering temperature determines the balance between hardness and toughness.

Final shaping and finishing of a forged horseshoe.
For detailed instructions on heat treatment processes, refer back to the Materials Science guide and its subpages, particularly Material Modification Techniques.
12. Troubleshooting Common Forging Problems
Several issues can arise during forging. Cold shuts occur when metal folds over onto itself without welding, creating a weak point; this often happens during upsetting or bending if the metal is not hot enough or improperly supported. Cracks can form if the metal is worked too cold, bent too sharply, or contains impurities. Burning occurs if the metal is overheated in the forge, causing irreversible damage and brittleness. Uneven heating leads to inconsistent shaping and potential cracking. Identifying these problems early and understanding their causes allows for correction or prevention through better technique and temperature control.
For detailed descriptions of common problems and their solutions, see our Troubleshooting Forging Problems guide.