Description
Materials science is the study of the properties, structure, and performance of materials, and how these characteristics can be controlled through processing. This field represents a critical advancement beyond basic metallurgy, allowing for the systematic development of materials with specific properties for particular applications. Understanding materials science enables the creation of stronger, lighter, more durable, and more specialized materials for tools, structures, and machines.

Early materials testing and analysis using primitive tools
Practical Guide to Materials Science
1. Understanding Material Properties
Before developing testing methods, it's essential to understand the key properties that determine a material's usefulness:
- Hardness: Resistance to indentation or scratching
- Strength: Ability to withstand force without breaking or deforming
- Ductility: Ability to be drawn into wire without breaking
- Malleability: Ability to be hammered into thin sheets
- Toughness: Resistance to fracture when under stress
- Density: Mass per unit volume
- Thermal Properties: Response to heat, including melting point and conductivity
- Chemical Reactivity: How the material interacts with other substances
For detailed information on material property fundamentals, see our Material Properties Fundamentals guide.
2. Primitive Materials Testing Methods
Even without modern equipment, you can develop systematic approaches to evaluate and compare materials:
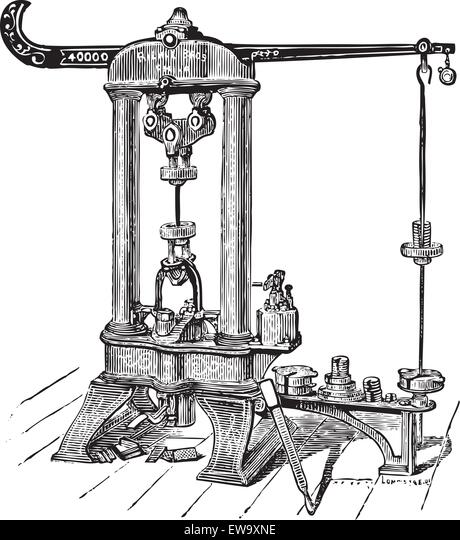
Historical apparatus for testing material properties
Hardness Testing (Scratch Method)
- Materials Needed:
- Collection of reference materials of known hardness (e.g., various minerals)
- Clean, flat surface of the test material
- Good lighting
- Procedure:
- Create a primitive Mohs scale by collecting reference materials:
- Talc (softest) - easily scratched with fingernail
- Gypsum - scratched by fingernail with difficulty
- Calcite - scratched by copper coin
- Fluorite - easily scratched by knife blade
- Apatite - scratched by knife with difficulty
- Orthoclase - scratched by steel file
- Quartz - scratches glass
- Topaz - scratches quartz
- Corundum - scratches topaz
- Diamond (hardest) - scratches all other materials
- Clean the surface of the test material
- Starting with the softest reference material, attempt to scratch the test material
- Continue with progressively harder reference materials until one successfully scratches the test material
- The hardness of the test material is between the hardness of the reference material that scratched it and the previous reference material that did not
- Create a primitive Mohs scale by collecting reference materials:
- Interpretation:
- Materials with hardness 1-2: Very soft, easily worked but wear quickly
- Materials with hardness 3-5: Moderate hardness, good for decorative items or non-load-bearing components
- Materials with hardness 6-7: Hard materials suitable for tools and weapons
- Materials with hardness 8-10: Extremely hard, difficult to work but excellent for cutting tools
For detailed instructions on creating a comprehensive hardness testing system, see our Hardness Testing Methods guide.
Density Testing (Water Displacement Method)
- Materials Needed:
- Container with water (preferably with straight sides)
- Method to mark water level (notch, charcoal, clay marker)
- Balance scale
- Reference weights (stones of known mass)
- Procedure:
- Weigh the test material using the balance scale and reference weights
- Mark the initial water level in the container
- Carefully place the material in the water
- Mark the new water level
- Remove the material and measure the volume of water needed to return from the initial level to the second mark (this equals the volume of the material)
- Calculate density by dividing the weight by the volume
- Interpretation:
- Materials that float in water have density less than 1 (good for boats, rafts)
- Stone typically has density 2-3 times that of water
- Metals have much higher densities (copper ~9 times water, iron ~8 times water, gold ~19 times water)
- Higher density metals like gold and lead can be identified by their exceptional heaviness for size
For detailed instructions on density testing variations, see our Density Testing Methods guide.
Strength Testing (Primitive Load Testing)
- Materials Needed:
- Two supports of equal height
- Sample material shaped into a bar or rod
- Weights of known mass (stones, metal pieces)
- Flat platform to hold weights
- Procedure:
- Place the sample across the two supports, creating a simple beam
- Position the platform at the center of the sample
- Gradually add weights to the platform
- Observe when the sample begins to bend permanently or breaks
- Record the total weight that caused failure
- Interpretation:
- Compare different materials of the same dimensions to determine relative strength
- Materials that bend before breaking (like copper) have good ductility
- Materials that break suddenly (like stone) are brittle
- Stronger materials can support more weight before failing
For detailed instructions on strength testing variations, see our Strength Testing Methods guide.
3. Chemical Reactivity Testing
Understanding how materials react with common substances helps determine their suitability for various applications:
Acid Resistance Test
- Materials Needed:
- Vinegar or lemon juice (weak acids)
- Small samples of test materials
- Clay or wooden containers
- Procedure:
- Place small samples of different materials in separate containers
- Cover each sample with vinegar or lemon juice
- Observe any reactions (bubbling, color change, dissolution)
- Check samples after 1 hour, 1 day, and 1 week
- Interpretation:
- Materials that bubble vigorously (like limestone) contain calcium carbonate
- Materials that slowly dissolve or change color are somewhat acid-reactive
- Materials showing no reaction are acid-resistant and suitable for containers holding acidic foods
Water Absorption Test
- Materials Needed:
- Dry samples of test materials
- Container of water
- Method to mark time (sundial, water clock, sand timer)
- Procedure:
- Place a few drops of water on the surface of the material
- Time how long it takes for the water to be absorbed
- Alternatively, weigh the material, submerge it in water for a set time, then weigh again after surface drying
- Interpretation:
- Materials that quickly absorb water are porous (good for filters, poor for water containers)
- Materials that repel water are suitable for containers and weather-exposed applications
- Materials that absorb water and soften may degrade in wet conditions
For detailed instructions on chemical reactivity testing, see our Chemical Reactivity Testing guide.
4. Thermal Property Testing
Understanding how materials respond to heat is crucial for applications involving fire, cooking, or metalworking:
Heat Conductivity Test
- Materials Needed:
- Rods or bars of different materials of equal dimensions
- Heat source (fire)
- Wax or animal fat
- Method to mark time
- Procedure:
- Apply small dabs of wax at regular intervals along each rod
- Heat one end of each rod simultaneously
- Observe and time how quickly the wax melts at each position
- Interpretation:
- Materials where wax melts quickly along the length are good heat conductors (metals)
- Materials where wax melts slowly or only near the heat source are poor conductors (stone, clay)
- Good conductors are useful for cooking vessels and metalworking tools
- Poor conductors are useful for handles and insulation
Heat Resistance Test
- Materials Needed:
- Samples of test materials
- Fire pit with controllable temperature
- Tongs or green wood sticks for handling hot materials
- Procedure:
- Heat the fire to a consistent temperature
- Place samples in the fire for a set time
- Remove and observe changes (cracking, warping, melting, color change)
- Test with progressively hotter fires
- Interpretation:
- Materials that crack or shatter have poor thermal shock resistance
- Materials that maintain integrity at high temperatures are suitable for furnaces and crucibles
- Materials that change properties after heating (like clay becoming ceramic) can be transformed by firing
For detailed instructions on thermal property testing, see our Thermal Property Testing guide.
5. Acoustic and Visual Testing
Simple but effective tests using sound and appearance can reveal important material properties:
Sound Test
- Materials Needed:
- Samples of materials suspended by string or balanced on edge
- Small hammer or striking implement
- Procedure:
- Suspend or balance the material to allow free vibration
- Strike the material with consistent force
- Listen to the sound produced (pitch, duration, clarity)
- Interpretation:
- Clear, ringing sounds indicate homogeneous, defect-free materials
- Dull thuds suggest internal flaws or cracks
- Higher pitches typically indicate harder, denser materials
- Longer ring duration suggests greater elasticity
Fracture Surface Examination
- Materials Needed:
- Freshly broken samples of materials
- Good lighting
- Magnifying lens (if available)
- Procedure:
- Break samples of different materials
- Examine the fracture surfaces in good light
- Note the texture, pattern, and appearance
- Interpretation:
- Crystalline appearance indicates brittle materials
- Fibrous or jagged fractures suggest tougher materials
- Uniform color and texture indicate homogeneous composition
- Variations in color or texture reveal composite or impure materials
For detailed instructions on acoustic and visual testing methods, see our Acoustic and Visual Testing guide.
6. Weathering and Durability Testing
Understanding how materials perform over time in natural conditions is essential for construction and tool-making:
Accelerated Weathering Test
- Materials Needed:
- Samples of test materials
- Containers for water immersion
- Area for sun exposure
- Fire for heat cycling
- Procedure:
- Subject samples to cycles of:
- Soaking in water (1 day)
- Drying in direct sunlight (1 day)
- Heating near fire then cooling rapidly (thermal shock)
- Repeat for multiple cycles (at least 10)
- Compare to untreated control samples
- Subject samples to cycles of:
- Interpretation:
- Materials showing minimal changes are weather-resistant
- Materials that crack, flake, or degrade are unsuitable for outdoor use
- Materials that absorb water and then crack during drying are vulnerable to freeze-thaw cycles
Wear Resistance Test
- Materials Needed:
- Flat samples of test materials
- Abrasive material (sand)
- Flat rubbing stone
- Method to count consistent strokes
- Procedure:
- Mark a line of consistent depth on each sample
- Place sand on the sample surface
- Rub with the stone using consistent pressure for a set number of strokes
- Measure how much material was removed
- Interpretation:
- Materials showing minimal wear are suitable for tools and high-traffic surfaces
- Materials that wear quickly should be used only where durability is less important
- Some materials may initially wear but then reach a stable state
For detailed instructions on weathering and durability testing, see our Weathering and Durability Testing guide.
7. Material Modification Techniques
Beyond testing, materials science involves modifying materials to enhance their properties:
Heat Treatment
Different heating and cooling regimes can dramatically alter material properties:
- Annealing: Heating metal to a specific temperature and cooling slowly to reduce hardness and increase workability
- Quenching: Rapidly cooling heated metal in water or oil to increase hardness (though often with increased brittleness)
- Tempering: Reheating quenched metal to a lower temperature to reduce brittleness while maintaining hardness
- Case Hardening: Creating a hard outer layer while maintaining a tough core by heating the material in carbon-rich environments
Mechanical Processing
Physical manipulation can alter material properties:
- Work Hardening: Repeatedly hammering or bending metal to increase its hardness and strength
- Cold Working: Shaping metal at room temperature to increase strength
- Hot Working: Shaping metal at elevated temperatures to allow greater deformation without cracking
Composite Creation
Combining materials to leverage the strengths of each:
- Fiber Reinforcement: Adding fibrous materials (plant fibers, hair) to clay or mud to increase tensile strength
- Lamination: Creating layers of different materials bonded together (like wood plies or forge-welded metals)
- Alloying: Mixing metals to create materials with properties superior to the individual components
For detailed instructions on material modification techniques, see our Material Modification Techniques guide.
8. Practical Applications
Applying materials science principles to solve real-world problems:
Tool Selection and Design
Choose materials based on application requirements:
- Cutting tools: Hard, wear-resistant materials for edges; tough, shock-absorbing materials for handles
- Pounding tools: Dense, tough materials that resist fracture under impact
- Cooking vessels: Heat-conductive materials that don't contaminate food
- Water containers: Non-porous materials resistant to water damage
Construction Material Selection
Choose materials based on structural needs:
- Load-bearing elements: Strong materials with good compressive strength
- Spanning elements: Materials with good tensile strength and flexibility
- Weather-exposed surfaces: Materials resistant to water, sun, and temperature changes
- Foundations: Materials that don't degrade when in contact with soil and moisture
Material Substitution
When ideal materials aren't available, use testing to find suitable alternatives:
- Identify the critical properties needed for the application
- Test available materials for those specific properties
- Consider modifications that might enhance suitable properties
- Create composites that combine complementary materials
For detailed case studies of materials science applications, see our Practical Applications guide.
9. Record Keeping and Knowledge Transfer
Systematic documentation is essential for advancing materials science:
Creating Material Reference Collections
- Collect and label samples of various materials
- Record their known properties and test results
- Organize by material type, source, or application
- Use as standards for comparison in future testing
Documenting Test Results
- Record exact testing procedures used
- Document environmental conditions during testing
- Note all observations, even unexpected ones
- Create comparative scales for subjective properties
Creating Material Selection Guides
- Organize materials by application category
- List required properties for each application
- Rank available materials by suitability
- Include processing requirements and limitations
For detailed instructions on materials science documentation, see our Documentation Methods guide.