Description
A water-powered mill harnesses the energy of flowing water to perform mechanical work, representing a significant advancement in human technological capability. By converting the kinetic energy of water into rotational force, these mills can grind grain, saw wood, process textiles, or power various other mechanical processes. This guide provides practical instructions for building a functional water-powered mill using only technologies available from earlier tiers.
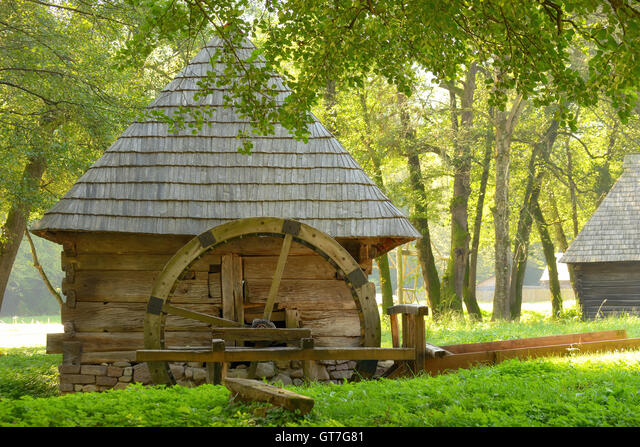
Traditional wooden water mill with undershot wheel design
Practical Guide to Building a Water-Powered Mill
1. Site Selection and Assessment
Identifying Suitable Water Sources
- Look for streams or rivers with:
- Consistent year-round flow (observe during different seasons)
- Sufficient volume and speed to turn a wheel
- Minimal seasonal flooding that could damage the mill
- Natural drop in elevation or potential for creating a drop
- Assess water flow rate:
- Measure the width and average depth of the stream
- Determine flow speed by timing a floating object over a measured distance
- Calculate approximate volume: width × depth × speed
- Evaluate potential head (vertical drop):
- Greater head means more power potential
- Measure elevation change using water levels or sight lines
- Identify natural falls or locations where a dam could create head
Site Preparation
- Clear the area of vegetation and obstacles
- Create a level foundation area for the mill structure
- Plan water channels or races to direct flow to and from the wheel
- Consider seasonal water level changes in your design
- Ensure stable ground conditions for foundations
2. Water Wheel Design and Construction
Wheel Types
Choose the appropriate wheel type based on your water source:
- Undershot Wheel: Water flows beneath, pushing paddles
- Best for: High volume, low head situations
- Efficiency: 15-30%
- Simplest to construct
- Breastshot Wheel: Water enters at axle height
- Best for: Medium head and flow
- Efficiency: 40-60%
- Moderate complexity
- Overshot Wheel: Water flows over the top
- Best for: High head, lower volume situations
- Efficiency: 60-80%
- More complex to construct
Materials Selection
- Choose rot-resistant woods for water contact:
- Oak, cedar, cypress, or other locally available hardwoods
- Season wood thoroughly before construction
- Prepare wooden components:
- Axle: Straight, strong log at least 8-10 inches in diameter
- Spokes: Straight branches 2-3 inches thick
- Rims: Flexible wood that can be bent into curves
- Paddles/Buckets: Flat boards 1-2 inches thick
- Gather fastening materials:
- Wooden pegs for joints
- Plant fiber rope for lashing
- Iron nails if available (from Tier 2 Iron Smelting)
Wheel Construction
- Prepare the axle:
- Select a straight, strong log
- Remove bark and smooth the surface
- Shape the ends to fit into bearing supports
- Mark spoke positions evenly around the circumference
- Create the wheel structure:
- Drill or chisel mortises into the axle for spokes
- Shape spokes with tenons to fit the mortises
- Insert spokes and secure with wedges
- Create two circular rims by bending wood strips
- Attach rims to the ends of the spokes
- Add paddles or buckets:
- For undershot: Attach flat paddles between the rims
- For overshot: Create bucket compartments between the rims
- Secure with wooden pegs, lashing, or nails
- Ensure water-tight connections for overshot wheels
- Balance the wheel:
- Mount temporarily and check for wobble
- Add weight to lighter sections as needed
- Ensure smooth rotation before final installation
3. Power Transmission System
Axle and Bearings
- Create bearing supports:
- Use large stones with carved depressions
- Or create wooden cradles lined with smooth stones
- Position to hold axle at proper height
- Reduce friction:
- Shape axle ends to rounded points
- Apply animal fat or plant oils as lubricant
- Create replaceable bearing surfaces from hardwood
Gearing Systems
- Direct drive (simplest):
- Mount millstone or saw directly on the main axle
- Limited to matching the wheel's rotation speed
- Lantern and crown gear (for speed increase):
- Create a large wooden gear (crown) on the main axle
- Construct a smaller gear (lantern) with pegs between two discs
- Mount lantern gear on vertical shaft to millstone
- Adjust gear sizes to achieve desired speed ratio
- Cam systems (for up-and-down motion):
- Attach offset pegs or lobes to the main axle
- Position a lever to be raised by the cams
- Use for trip hammers, bellows, or pumps
4. Mill Building Construction
Foundation and Structure
- Create a stable foundation:
- Use stone piers or walls for support
- Ensure level mounting for machinery
- Build above potential flood levels
- Construct the building frame:
- Use post and beam construction
- Create strong supports for machinery weight
- Allow access for maintenance and operation
- Add walls and roof:
- Use wattle and daub, planks, or stone for walls
- Create a pitched roof for water runoff
- Include windows for light and ventilation
Water Control Systems
- Construct a headrace (incoming channel):
- Dig a channel from water source to wheel
- Line with clay, stone, or wood to prevent erosion
- Maintain consistent slope for steady flow
- Create a tailrace (outgoing channel):
- Ensure proper drainage away from the wheel
- Prevent backwater that could slow the wheel
- Reinforce to prevent erosion
- Build control mechanisms:
- Create a simple sluice gate to control water flow
- Design a bypass channel for excess water
- Include a method to stop flow for maintenance
5. Millstone Preparation (for Grain Mills)
Stone Selection and Preparation
- Choose appropriate stone:
- Sandstone, granite, or other hard, non-flaking stone
- Look for uniform texture without cracks
- Select stones approximately 2-3 feet in diameter
- Shape the stones:
- Create circular stones of matching diameter
- Drill or chisel a center hole in each
- Make the upper stone (runner) slightly concave
- Make the lower stone (bedstone) slightly convex
- Cut grinding patterns:
- Chisel furrows radiating from center to edge
- Create lands (flat areas) between furrows
- Ensure patterns on upper and lower stones complement each other
Millstone Installation
- Mount the bedstone:
- Set firmly on a level platform
- Ensure it cannot move during operation
- Center precisely under the drive shaft
- Install the runner stone:
- Create a rynd (crosspiece) to connect to the drive shaft
- Balance carefully to prevent wobbling
- Set proper gap between stones (adjustable if possible)
- Add hopper and collection system:
- Build a wooden hopper to feed grain
- Create a shoe to control grain flow rate
- Construct a collection area for the ground meal
6. Operation and Maintenance
Starting and Operating
- Prepare the system:
- Check all components for proper alignment
- Apply lubricant to all bearing surfaces
- Clear debris from water channels
- Start operation:
- Open water control gate gradually
- Allow wheel to reach operating speed before applying load
- Monitor for unusual sounds or vibrations
- Adjust as needed:
- Control water flow to maintain desired speed
- Adjust millstone gap for proper grinding
- Regulate material feed rate
Regular Maintenance
- Daily/weekly tasks:
- Clear debris from water channels and wheel
- Check and replenish lubricants
- Inspect for loose components
- Monthly tasks:
- Check wheel balance and alignment
- Inspect gearing for wear
- Examine building structure for damage
- Seasonal tasks:
- Dress millstones to sharpen grinding surfaces
- Repair or replace worn paddles/buckets
- Reinforce water channels before high-flow seasons
- Prepare for freezing conditions if applicable
Troubleshooting Common Issues
Wheel Turns Slowly or Stops
Cause: Insufficient water flow, excessive friction, or obstruction
Solution: Check water supply and channels for blockages; inspect bearings for wear; look for debris caught in wheel
Excessive Vibration
Cause: Unbalanced wheel, misaligned axle, or loose components
Solution: Rebalance wheel; check and adjust axle alignment; tighten or replace fasteners
Uneven Grinding
Cause: Worn millstone patterns, improper stone gap, or speed variations
Solution: Redress millstone surfaces; adjust stone gap; stabilize water flow for consistent speed
Water Leakage
Cause: Damaged channels, eroded banks, or poor sealing
Solution: Repair channel linings; reinforce banks; improve sealing with clay or other materials