Fire Plough Fire Making
The fire plough (also called fire plow) is one of the simplest friction-based fire making methods, requiring minimal components and preparation. This technique is particularly valuable in environments where suitable materials for other methods may be scarce, such as tropical or coastal regions.
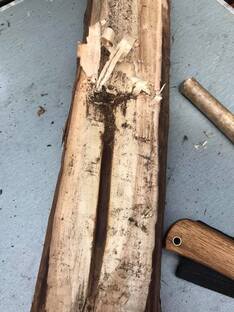
Fire plough technique being demonstrated
Detailed Guide to Fire Plough Fire Making
1. Material Selection
Baseboard Selection
- Ideal characteristics:
- Soft, dry wood with minimal resin
- Flat piece approximately 1-2 inches (2.5-5cm) wide
- About 12-18 inches (30-45cm) long
- ½ to 1 inch (12-25mm) thick
- Straight grain running the length of the board
- Recommended species:
- Hibiscus (especially in tropical regions)
- Cedar
- Cottonwood
- Willow
- Yucca stalk (split lengthwise)
- Bamboo (split and opened flat)
- Preparation:
- Ensure one side is flat and smooth
- The wood should be completely dry
- Remove any bark or knots
Plough (Rubbing Stick) Selection
- Ideal characteristics:
- Harder wood than the baseboard
- Straight piece approximately 12-15 inches (30-38cm) long
- About ½ to ¾ inch (12-18mm) in diameter
- One end rounded or pointed
- Recommended species:
- Hardwoods that are denser than your baseboard
- Avoid resinous woods that might become slippery
- Preparation:
- Shape one end to a rounded point or chisel edge
- Ensure the wood is completely dry
- The stick should be straight and free of side branches
Tinder Preparation
- Ideal characteristics:
- Very fine, dry, and fibrous material
- Catches an ember easily
- Can be formed into a nest or bundle
- Recommended materials:
- Shredded inner bark (cedar, hibiscus, coconut)
- Dried grasses pounded to separate fibers
- Coconut husk fibers (in tropical regions)
- Palm fibers
- Dried and shredded fungi
- Preparation:
- Process material until it's as fine as possible
- Form into a nest shape with a depression in the center
- Keep completely dry until needed
2. Baseboard Preparation
- Creating the groove:
- Use a stone tool or knife to cut a straight groove along the length of the baseboard
- The groove should be about ¼ inch (6mm) wide and ¼ inch deep
- Make the groove slightly wider at one end where you'll collect the dust
- Ensure the groove is clean and free of debris
- Tinder placement:
- Place a small amount of your finest tinder at the end of the groove
- This will catch the hot dust as it's pushed along the groove
- Have your main tinder bundle ready nearby
- Positioning:
- Place the baseboard on firm, flat ground
- Secure it with your feet or knees to prevent movement
- The end with the tinder should be slightly lower if possible
3. Fire Plough Technique
Basic Position
- Kneel or sit with the baseboard between your legs or knees
- Secure the baseboard firmly to prevent movement
- Hold the plough stick with both hands, one near each end
- Position the tip of the plough stick in the groove at the end opposite your tinder
- The plough should be at a 45° angle to the baseboard
Ploughing Motion
- Starting phase:
- Apply moderate downward pressure on the plough
- Push the plough away from you along the groove
- Return to the starting position with the tip slightly raised
- Repeat with a steady rhythm
- Goal: Create an initial groove and warm the wood
- Building phase:
- Gradually increase speed and downward pressure
- Maintain a consistent angle and pressure
- As the groove deepens, wood dust will begin to accumulate at the end
- Goal: Generate significant heat and create wood dust
- Ember phase:
- When you see smoke increasing, maintain or increase speed
- Focus on pushing the hot dust toward the tinder at the end
- Continue until the dust begins to glow
- Goal: Create a glowing ember in the accumulated dust
Body Mechanics
- Hand position:
- Grip the plough firmly with both hands
- One hand near the working end for downward pressure
- One hand at the far end for control and leverage
- Arm and shoulder technique:
- Use your arms and shoulders, not just your wrists
- Keep movements smooth and consistent
- Use your body weight to help apply pressure
- Posture:
- Position your body so you can apply consistent downward pressure
- Brace the baseboard firmly with your legs or knees
- Maintain a position you can hold comfortably for several minutes
4. Ember to Fire Process
- Identifying a successful ember:
- Look for a glowing red spot in the pile of dust at the end of the groove
- It should continue to glow and produce smoke after you stop ploughing
- The ember may be smaller than with other friction methods
- Transferring the ember:
- Carefully add the small amount of tinder placed at the end of the groove to the ember
- Gently blow on the ember to strengthen it
- Once the tinder begins to smoke vigorously, transfer it to your main tinder bundle
- Building the flame:
- Place the ember and small tinder into your prepared tinder bundle
- Gently fold the tinder around the ember
- Hold the bundle at eye level and blow gently and steadily
- As smoke increases, blow more firmly
- When flames appear, place the bundle in your prepared fire structure
- Add progressively larger kindling as the fire grows
5. Troubleshooting
Common Problems and Solutions
- Plough stick slipping out of groove:
- Deepen the groove slightly
- Adjust your angle to keep the stick in the groove
- Apply more consistent pressure
- Excessive wear on plough stick:
- Use a harder wood for the plough
- Rotate the plough occasionally to distribute wear
- Apply less pressure but increase speed
- Dust not collecting at end of groove:
- Ensure your plough strokes reach the full length of the groove
- Tilt the baseboard slightly so gravity helps collect dust
- Make the end of the groove slightly wider and deeper
- Smoke but no ember:
- Continue ploughing longer - this method often requires persistence
- Increase speed rather than pressure
- Ensure your materials are completely dry
- Try a different wood combination
- Ember dies quickly:
- Your tinder may be too damp
- The ember may be too small - plough longer next time
- Blow more gently and consistently
- Ensure your tinder is fine enough
Environmental Adaptations
- Humid conditions:
- Store materials inside clothing to dry with body heat
- Look for materials under rock overhangs or inside hollow logs
- In tropical environments, look for dead standing bamboo which often remains dry inside
- Limited materials:
- In coastal areas, driftwood that has dried thoroughly can work
- In tropical regions, bamboo and palm materials can be effective
- Split larger pieces of wood to access drier interior portions
6. Regional Variations
The fire plough has been used by indigenous peoples worldwide, with regional adaptations:
- Polynesian technique:
- Uses softer woods like hibiscus
- Often employs a shorter, more aggressive stroke
- Frequently used with coconut husk fiber as tinder
- Southeast Asian variation:
- Often uses split bamboo for both the baseboard and plough
- The natural silica in bamboo creates additional friction
- Bamboo dust is highly combustible
- Australian Aboriginal technique:
- Often uses a longer baseboard with multiple users
- One person may hold the board while another ploughs
- Adapted to work with native Australian hardwoods
7. Practice and Skill Development
The fire plough requires significant physical effort but less technical skill than some other methods:
- Beginner practice:
- Focus on maintaining a consistent groove
- Practice the motion without expecting immediate results
- Build endurance for the repetitive motion
- Intermediate practice:
- Experiment with different wood combinations
- Practice in different weather conditions
- Work on efficient body mechanics to reduce fatigue
- Advanced practice:
- Try to create an ember in under two minutes
- Practice with less-than-ideal materials
- Create fire in adverse conditions