Detailed Guide to Stone Selection
Selecting the right stone materials is the foundation of Stone Age technology. Not all stones are suitable for toolmaking, and learning to identify and test appropriate materials is a critical survival skill. This guide provides detailed information on identifying, collecting, and testing stone materials for toolmaking.
1. Identifying Suitable Stone Types
Flint

Appearance: Usually gray, black, or brown with a waxy or glassy luster. Often found as nodules with a chalky white outer layer (cortex).
Where to find it: Commonly embedded in chalk or limestone deposits. Look for exposed cliff faces, quarries, beaches near chalk cliffs, or riverbeds that cut through chalk/limestone areas.
Properties: Breaks with a distinctive conchoidal (shell-like) fracture, creating predictable sharp edges. Extremely hard (7 on Mohs scale) and durable.
Best uses: Precision cutting tools, scrapers, projectile points, and fire-starting.
Obsidian
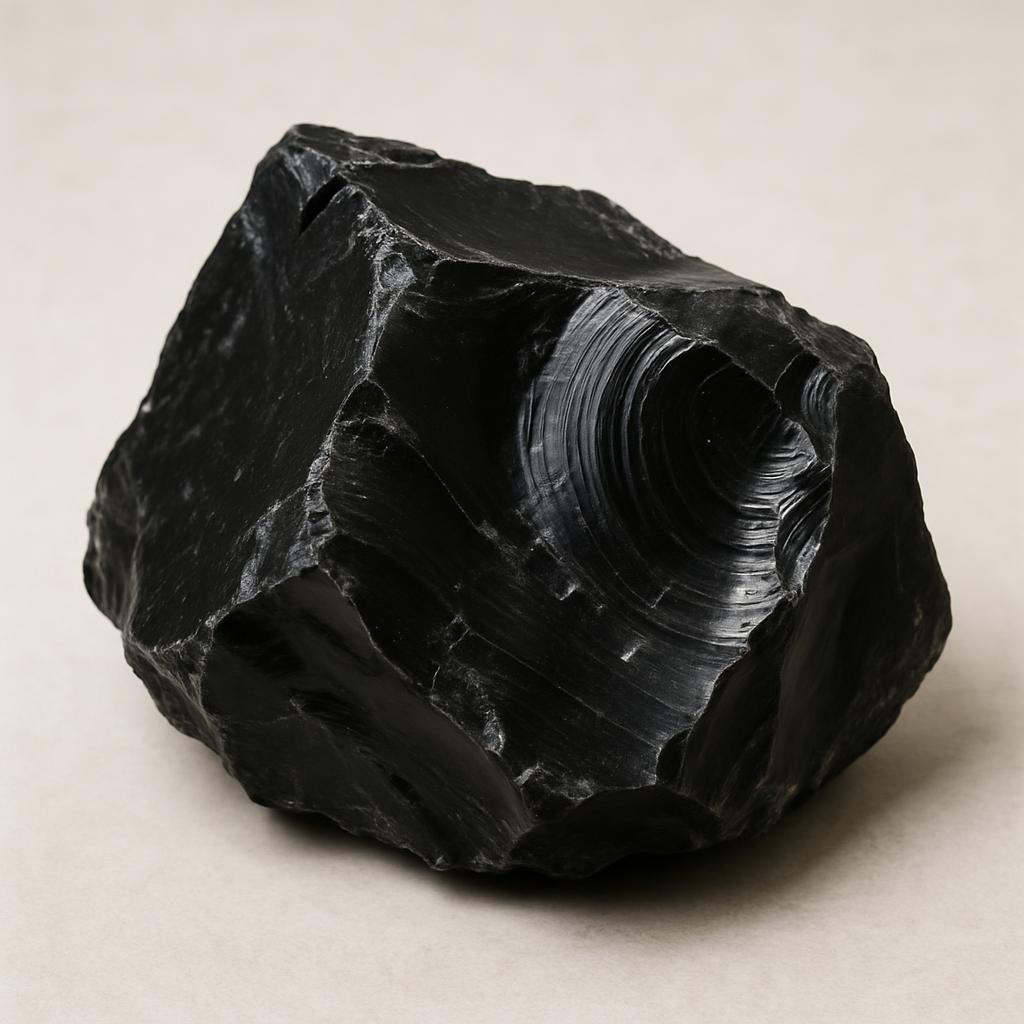
Appearance: Black or dark-colored volcanic glass with a glassy sheen. Sometimes has streaks or bands of color.
Where to find it: Near volcanic regions only. Look for areas with recent volcanic activity (within geological timeframes).
Properties: Creates the sharpest known natural edges (sharper than surgical steel), but more brittle than flint. Breaks with perfect conchoidal fracture.
Best uses: Ultra-sharp cutting tools, precision work, surgical tools, and ceremonial items. Not ideal for heavy-duty chopping or pounding.
Chert
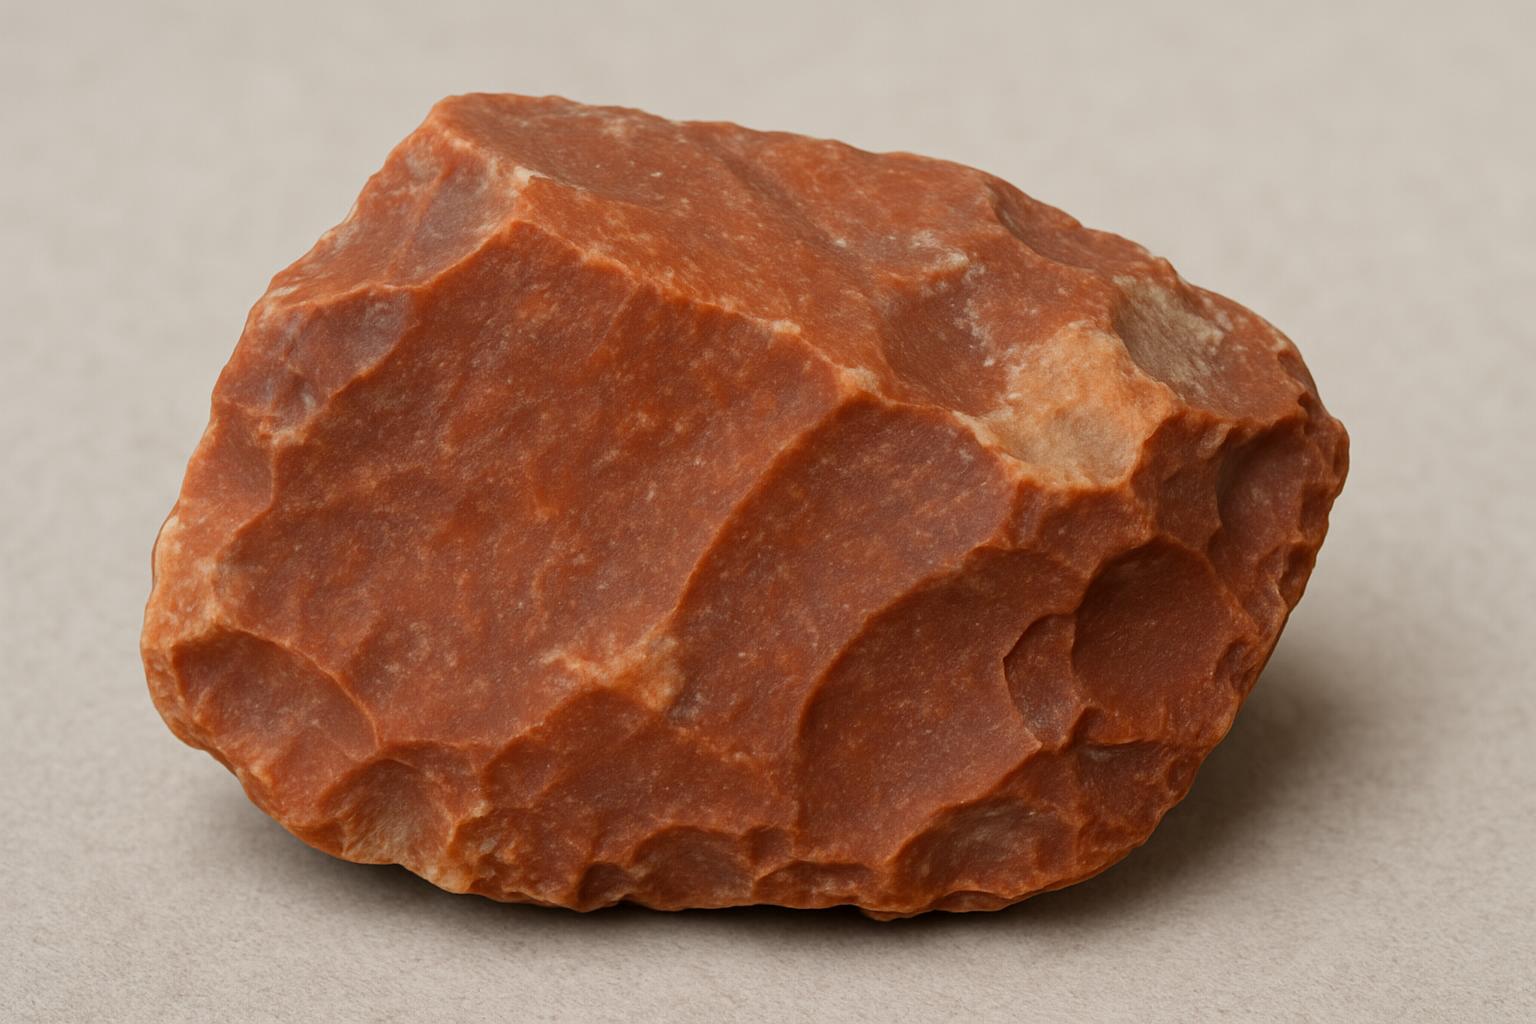
Appearance: Similar to flint but more varied in color - can be red, green, brown, yellow, or white. Often has a duller luster than flint.
Where to find it: In sedimentary rock formations, particularly limestone and dolomite. Also found in riverbeds and gravel deposits.
Properties: Slightly less homogeneous than flint but still produces good conchoidal fractures. Very durable for tool use.
Best uses: General-purpose cutting tools, scrapers, and larger implements.
Quartzite
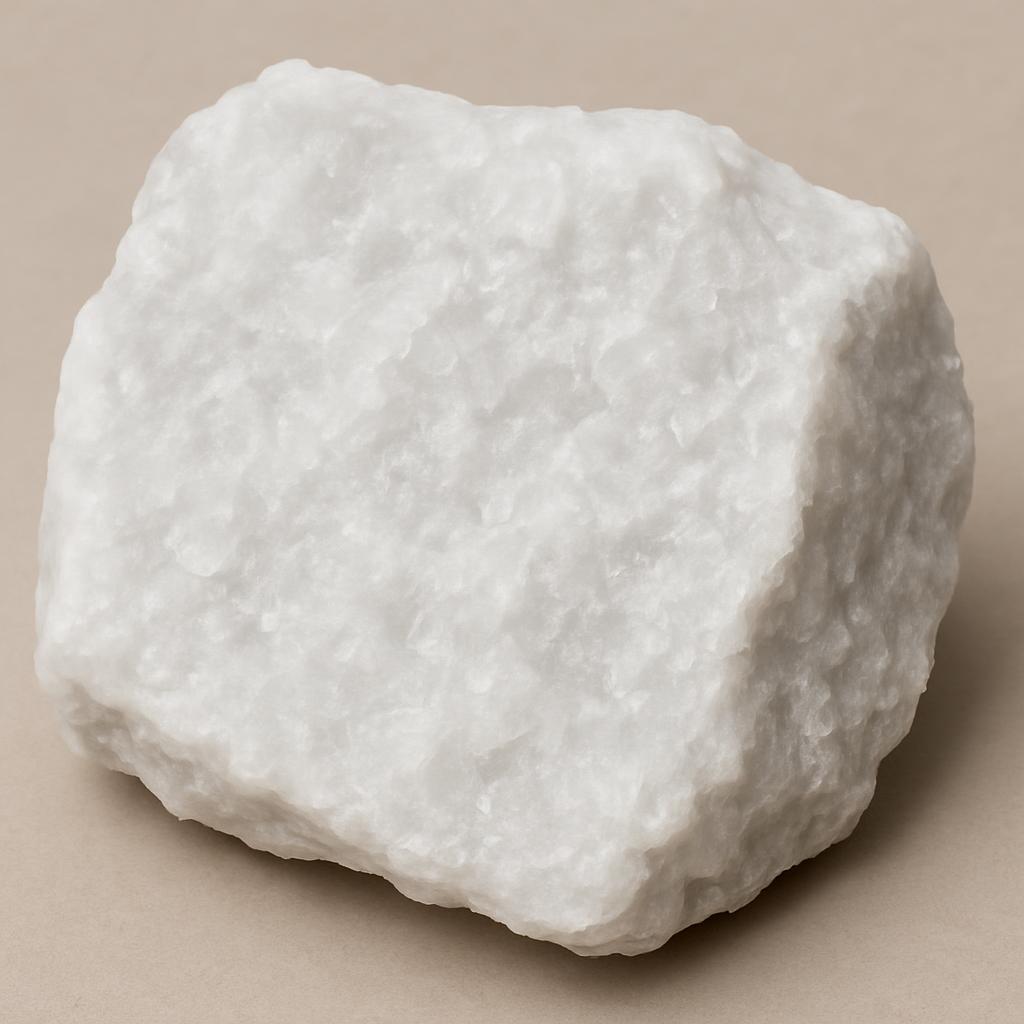
Appearance: Often white or light-colored with a granular, sugar-like texture. Can also be pink, red, or yellow.
Where to find it: In metamorphic rock formations. Often found as cobbles in riverbeds.
Properties: Extremely hard and durable. Doesn't fracture as predictably as flint but can still make effective tools.
Best uses: Hammerstones, grinding tools, and durable cutting implements.
Basalt
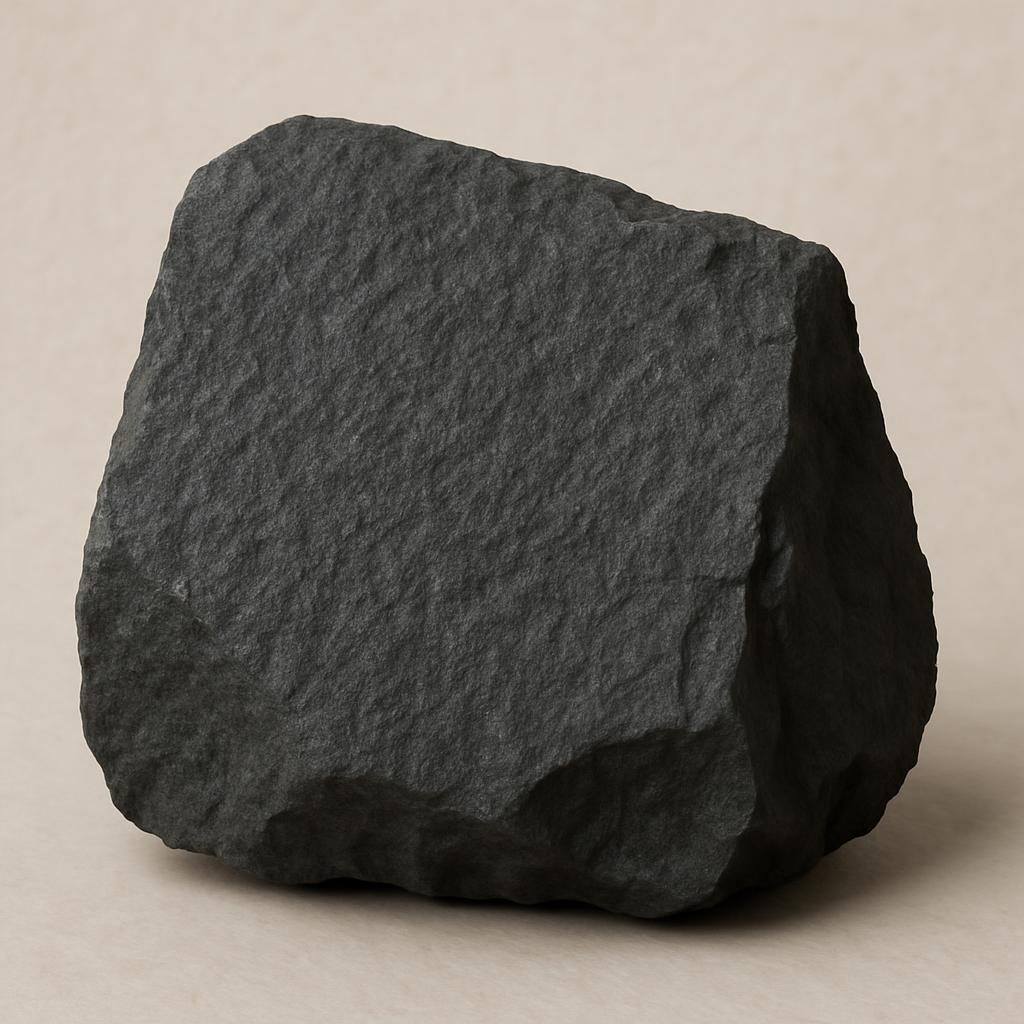
Appearance: Dark gray to black, fine-grained volcanic rock. Often has a matte appearance.
Where to find it: Common in volcanic regions, can form large deposits or flows.
Properties: Dense and durable but doesn't fracture as predictably as flint or obsidian. Can be ground and polished effectively.
Best uses: Ground stone tools, axes, hammers, and grinding implements.
2. Advanced Collection Methods
Riverbed Collection
Rivers and streams are excellent sources for toolmaking stones because:
- Water action has already removed weaker stones
- Stones are often naturally tumbled and pre-shaped
- Fresh material is regularly exposed
Technique:
- Focus on areas where water speed changes - inside bends, behind large obstacles, and at widening points where the current slows
- Look for stones that appear different from the majority (color, luster, texture)
- Test stones while still wet - good knapping stones often show their quality better when wet
- Collect more material than you think you'll need - many stones will prove unsuitable upon closer inspection
Cliff Face and Outcrop Examination
Technique:
- Look for nodules or bands of different-colored material embedded in rock faces
- Examine the base of cliffs for fallen material
- Use a hammerstone to carefully extract embedded nodules
- Test freshly exposed surfaces for quality
Safety note: Always check cliff stability before approaching. Loose material can fall without warning.
Excavation Methods
Technique:
- Identify promising areas where stones may be concentrated:
- Ancient river terraces now above water level
- Eroding hillsides with visible stone fragments
- Areas where animals have dug into the soil
- Dig test pits approximately 1-2 feet deep
- Use a digging stick to loosen soil and a flat piece of wood or bone to remove it
- Sift through removed soil to find smaller pieces
- When you find a productive layer, expand horizontally rather than continuing deeper
3. Testing Stone Quality
Sound Testing
Technique:
- Hold the stone firmly in one hand
- Tap it lightly with another stone or hard object
- Listen for the sound:
- Good toolmaking stones produce a clear, ringing sound
- Poor quality stones make a dull thud
- Stones with internal cracks often produce a flat or dead sound
Fracture Testing
Technique:
- Find a safe location away from eyes and bare skin
- Strike a small corner of the stone to remove a test flake
- Examine the fracture surface:
- Good toolmaking stone shows a smooth, curved (conchoidal) fracture
- The edge of the flake should be sharp and predictable
- The surface should have a waxy or glassy appearance
- Poor quality stone breaks irregularly or crumbles
- Test the edge of the flake by carefully drawing it across a piece of wood - it should create a scratch or shaving
Visual Inspection
Technique:
- Look for homogeneous material without visible inclusions, cracks, or changes in texture
- For cortex-covered stones (like flint nodules), look for places where the cortex has naturally broken away to reveal the interior
- Hold translucent stones up to light to check for internal flaws
- Wet the stone to better see the grain structure and potential flaws
4. Preparing and Storing Stone Materials
Initial Processing
Technique:
- Remove unstable portions:
- Test for and remove weathered outer surfaces
- Eliminate portions with visible cracks or inclusions
- Create a stable platform for future work
- Reduce to manageable size:
- Break very large pieces into workable cores
- Use the bipolar technique (placing the stone on an anvil stone and striking from above) for controlled breaking
Storage Considerations
Technique:
- Keep different stone types separate
- Store in dry conditions - some stones (especially flint) can absorb moisture and become more difficult to work
- Protect edges from damage by wrapping in hide or plant material
- For long-term storage, bury in dry sand or soil to maintain stable humidity
5. Seasonal Considerations
Best Collection Times
- After heavy rains: Freshly exposed material in riverbeds and eroded areas
- Early spring: Winter freeze-thaw cycles often expose new material
- Low water seasons: More riverbed exposure
- After storms at coastal areas: Wave action exposes new material
Creating a Stone Calendar
Develop a mental or physical calendar of stone collection locations based on seasonal changes:
- Map locations that are productive during different seasons
- Note which areas become inaccessible during certain times (flooding, snow cover)
- Plan collection expeditions to coincide with optimal conditions
- Collect surplus during abundant periods to last through scarce times
Conclusion
Mastering stone selection is the foundation of Stone Age technology. By learning to identify, test, and collect quality stone materials, you establish the basis for all tool creation. Remember that different stone types have different properties and uses - diversify your collection to have appropriate materials for various tools and tasks.
With practice, you'll develop an intuitive understanding of stone quality that goes beyond these guidelines. The ability to quickly assess and select appropriate stone materials is perhaps the most fundamental survival skill in a stone-based technology system.