Detailed Guide to Basic Stone Tool Creation
Creating stone tools is the fundamental technology that launched human technological development. This guide provides detailed, practical instructions for the two primary stone tool creation techniques: percussion flaking and pressure flaking. With these skills, you can create a variety of cutting, scraping, and piercing tools essential for survival and further technological advancement.
1. Percussion Flaking Technique
Workspace Preparation

Essential setup:
- Find a flat, stable surface at a comfortable height
- Clear the area of debris that might interfere with your work
- Position yourself with good lighting - ideally natural light from the side
- Prepare a soft surface (hide, thick leaves) to catch flakes for potential use
- Have a container of water nearby to keep stones damp (improves flaking quality)
- Arrange protective materials for your hands and eyes (leather scraps, etc.)
Safety considerations:
- Stone flakes are extremely sharp - position your body away from flaking direction
- Protect your eyes from flying chips
- Work in an area where others won't be hit by debris
- Have materials ready to treat cuts (clean water, plant poultices)
Tool Selection
Core stone selection:
- Choose a stone of appropriate size for your intended tool
- Look for stones with at least one flat surface (striking platform)
- Examine for cracks or inclusions that might cause unpredictable breaks
- For beginners, start with a stone roughly the size of your fist
Hammerstone selection:
- Choose a dense, rounded stone that fits comfortably in your hand
- Ideal hammerstones are slightly heavier than the core stone
- For fine work, select a smaller, more precise hammerstone
- For initial shaping, use a larger, heavier hammerstone
Alternative hammers:
- Antler hammers: Create from the base of an antler, excellent for controlled flaking
- Bone hammers: Dense animal bones can be used for more precise work
- Wooden billets: Hardwood hammers for softer percussion work
Basic Flaking Process
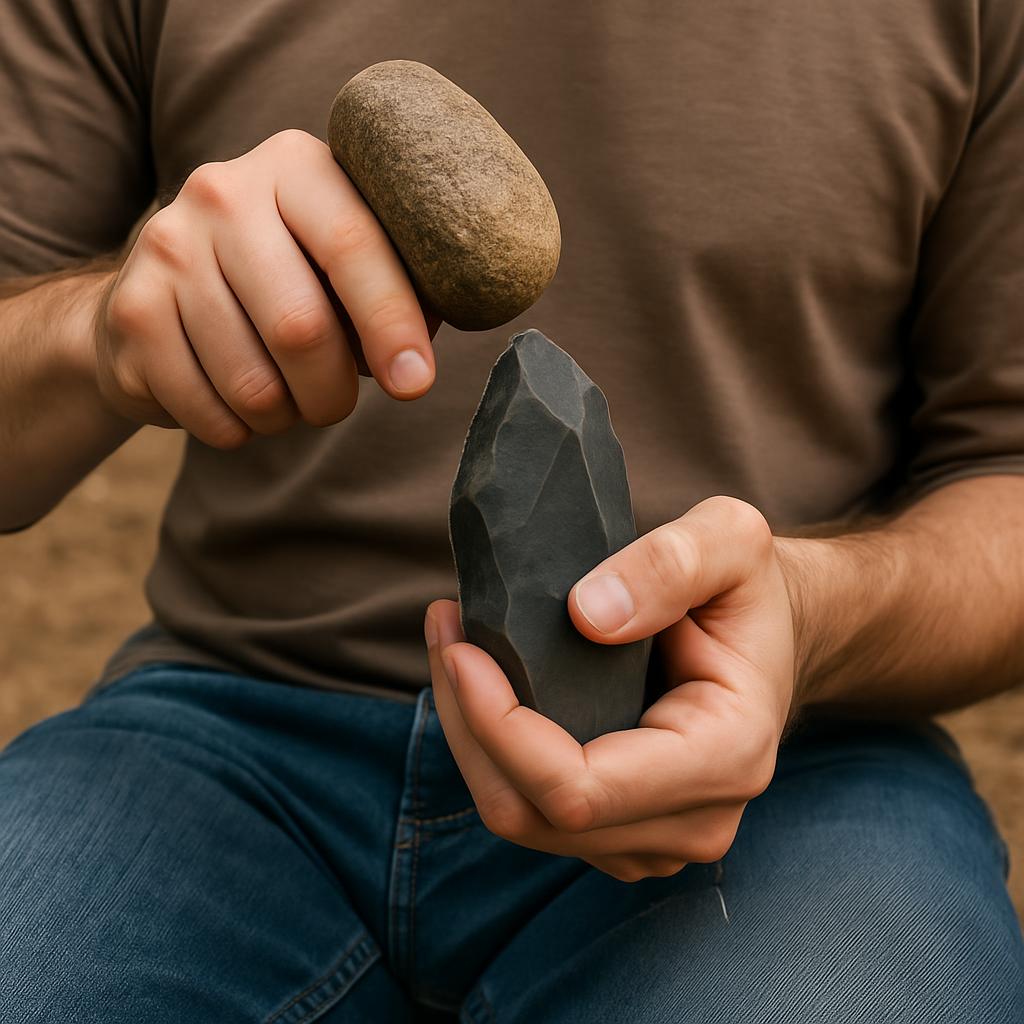
Hand positioning:
- Hold the core stone in your non-dominant hand
- Position your fingers away from the striking area and potential flake path
- Support the core stone firmly but not rigidly - some "give" improves flaking
- Hold the hammerstone in your dominant hand with a firm grip
Strike mechanics:
- Identify the platform edge where you'll strike
- Position the core so the platform is at approximately a 45-60° angle
- Strike inward and slightly downward, about 1/4 inch (6mm) from the edge
- Use a quick, controlled motion - not a heavy smashing action
- The force should travel through the stone, not just impact the surface
Reading the stone:
- Observe how the stone responds to each strike
- Look for ripple patterns on flakes to understand force transmission
- Adjust your angle and force based on results
- Rotate the core to find optimal striking platforms
Creating a Hand Axe
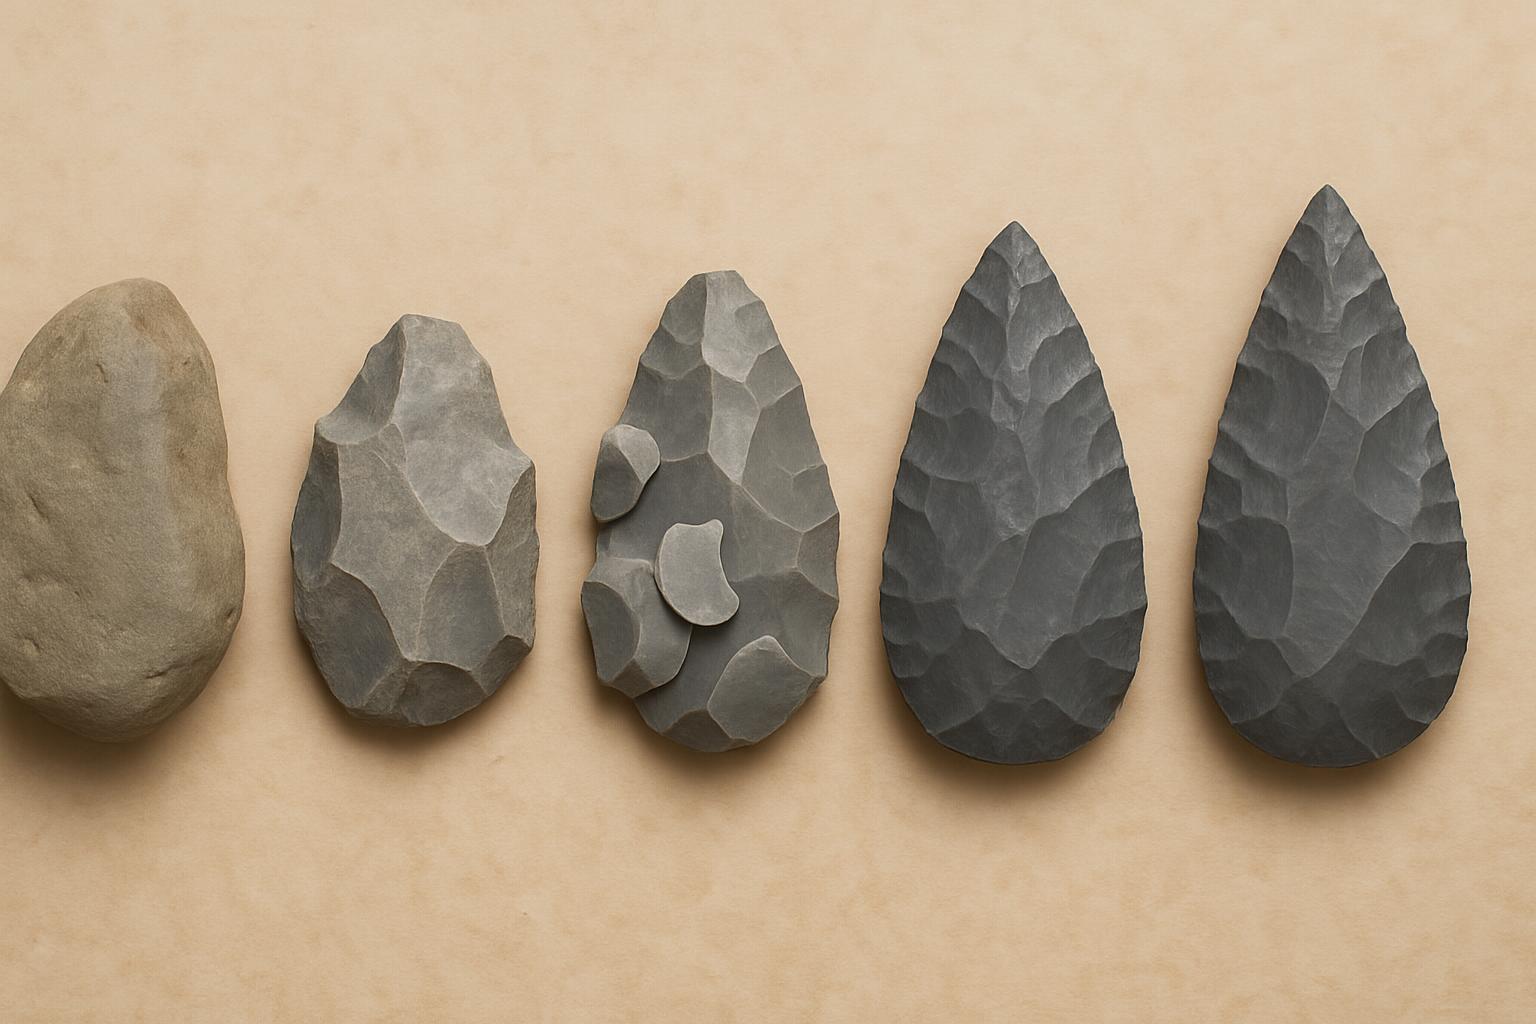
Step-by-step process:
- Select appropriate material:
- Choose a stone roughly 4-6 inches (10-15 cm) in length
- Look for an oval or teardrop-shaped stone if possible
- Ensure the stone has good flaking properties (flint, chert, etc.)
- Initial shaping:
- Create a flat platform on one end if not already present
- Begin removing large flakes from the perimeter
- Work systematically around the edge
- Establish the basic teardrop shape
- Thinning:
- Remove flakes from both faces to thin the profile
- Work from the edges toward the center
- Maintain bilateral symmetry by alternating sides
- Keep the center ridge straight for strength
- Edge refinement:
- Use a smaller hammerstone or antler billet
- Remove smaller flakes to create a sharp, even edge
- Work carefully to maintain the edge angle (approximately 30-40°)
- Pay special attention to the pointed end
- Final shaping:
- Ensure the grip area is comfortable and free of sharp edges
- Test the balance of the tool in your hand
- Make final adjustments to the cutting edge
- Remove any weak or protruding sections
Common problems and solutions:
- Step fractures: If flakes terminate abruptly in a step, change your angle or strike from the opposite direction
- Hinge fractures: If flakes curl and terminate early, increase your force or change the platform angle
- Overshot flakes: If flakes remove too much material by traveling across the piece, reduce your force
2. Pressure Flaking Technique
Materials and Tools
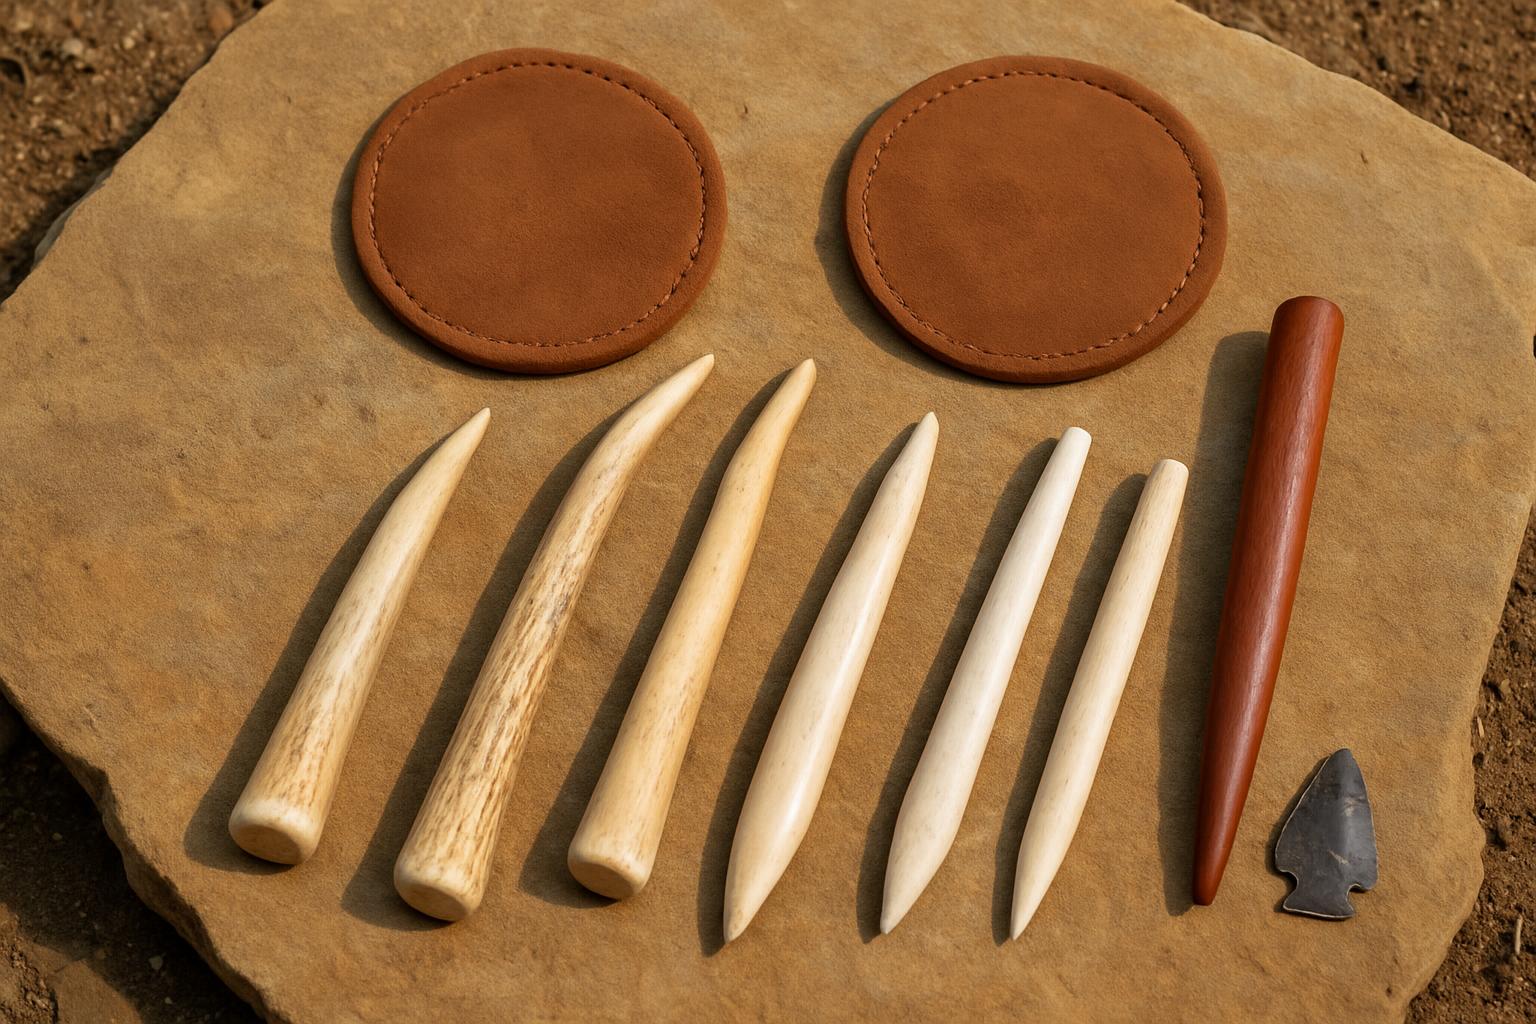
Pressure flakers:
- Antler tine: The tip of an antler, ideally from deer or elk
- Bone point: A shaped piece of dense bone
- Hardwood point: A shaped stick of very dense wood
- Stone point: A small, pointed stone (for very fine work)
Creating a pressure flaker:
- Select an antler tine or suitable bone
- Shape one end to a blunt point (not too sharp)
- The tip should be about 2-3mm wide
- Smooth the tip to prevent it from crumbling
- Create handles of different lengths for different applications
Hand protection:
- Create a small leather pad to protect your palm
- Alternatively, use a thick piece of bark or folded hide
- This protection is essential as pressure flaking can cause painful pressure points
Basic Pressure Flaking Process
Hand positioning:
- Hold the stone in your non-dominant hand
- Place the leather pad in your palm under the stone
- Position your fingers to support the stone securely
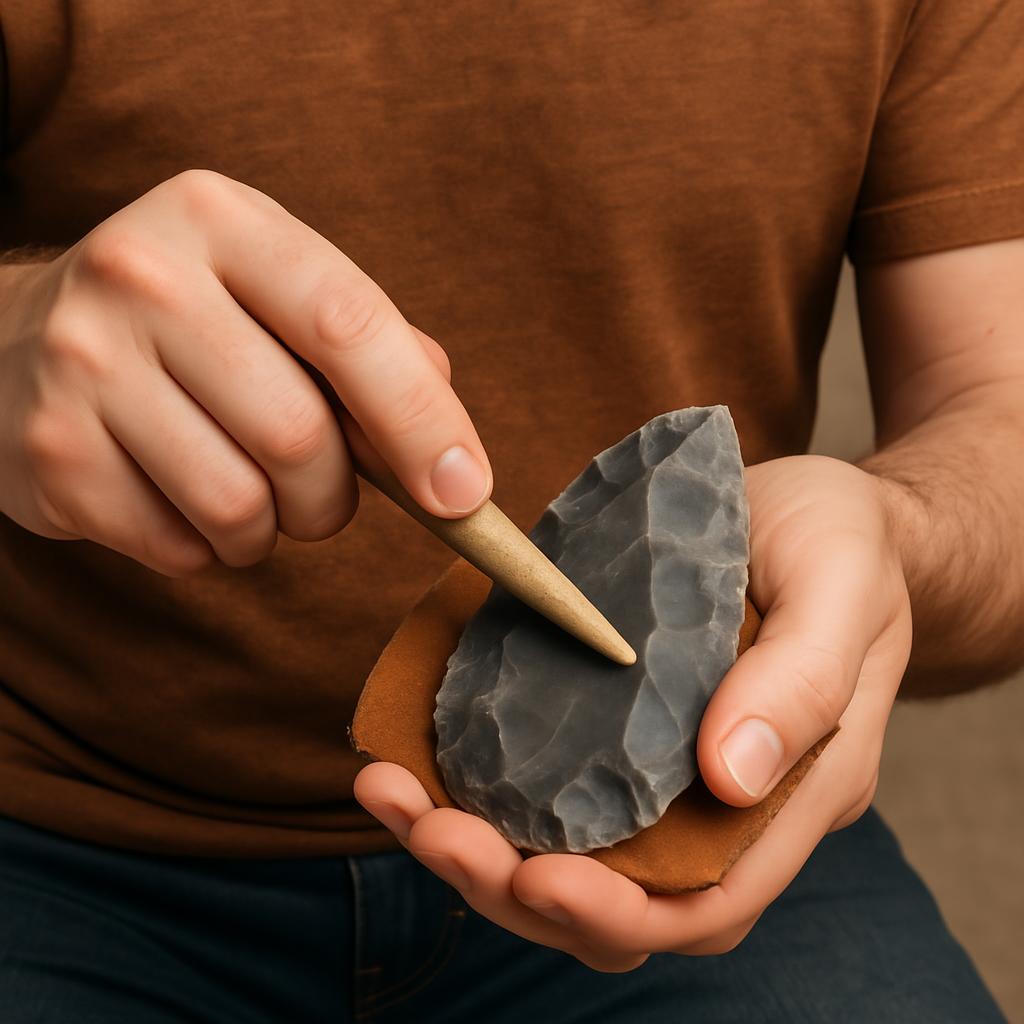
- Hold the pressure flaker in your dominant hand like a pencil
Flaking technique:
- Position the tip of the flaker on the edge at a 45° angle
- Brace the flaker against your body or thigh for stability
- Apply steady, increasing pressure (don't jab or push suddenly)
- Continue pressure until you feel/hear a flake detach
- Work systematically along the edge
Platform preparation:
- Before applying pressure, prepare the edge by grinding or abrading slightly
- This removes weak points and creates a stronger platform
- Use a small stone or rough surface for this preparation
- Good platform preparation is the key to successful pressure flaking
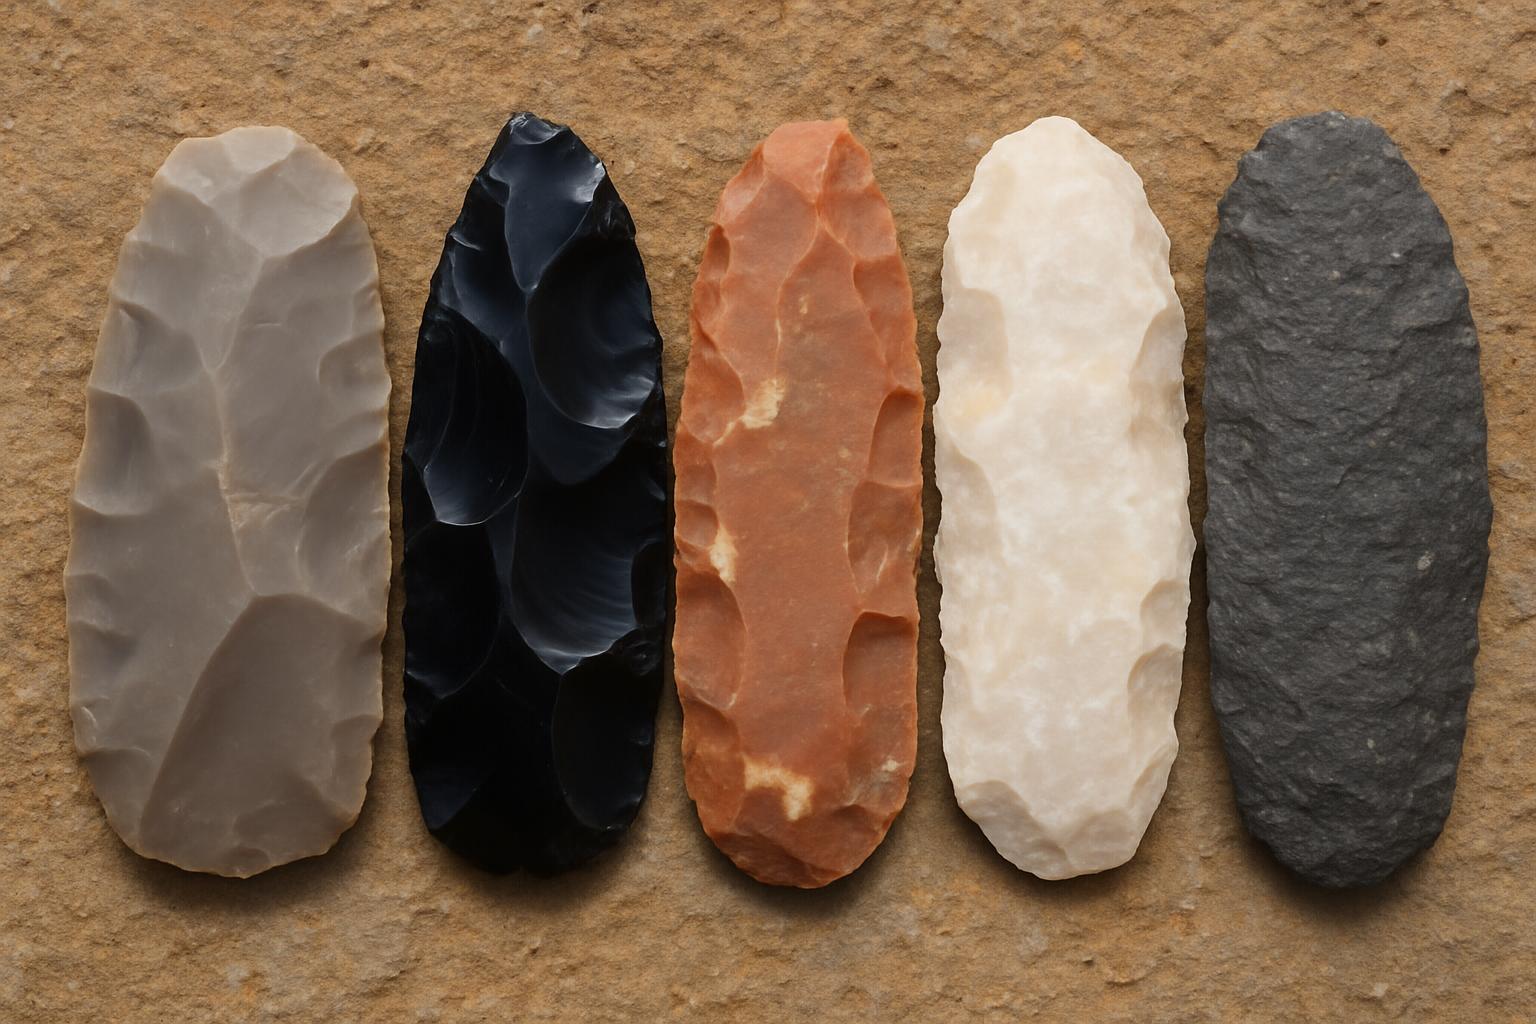
Refining a Stone Point
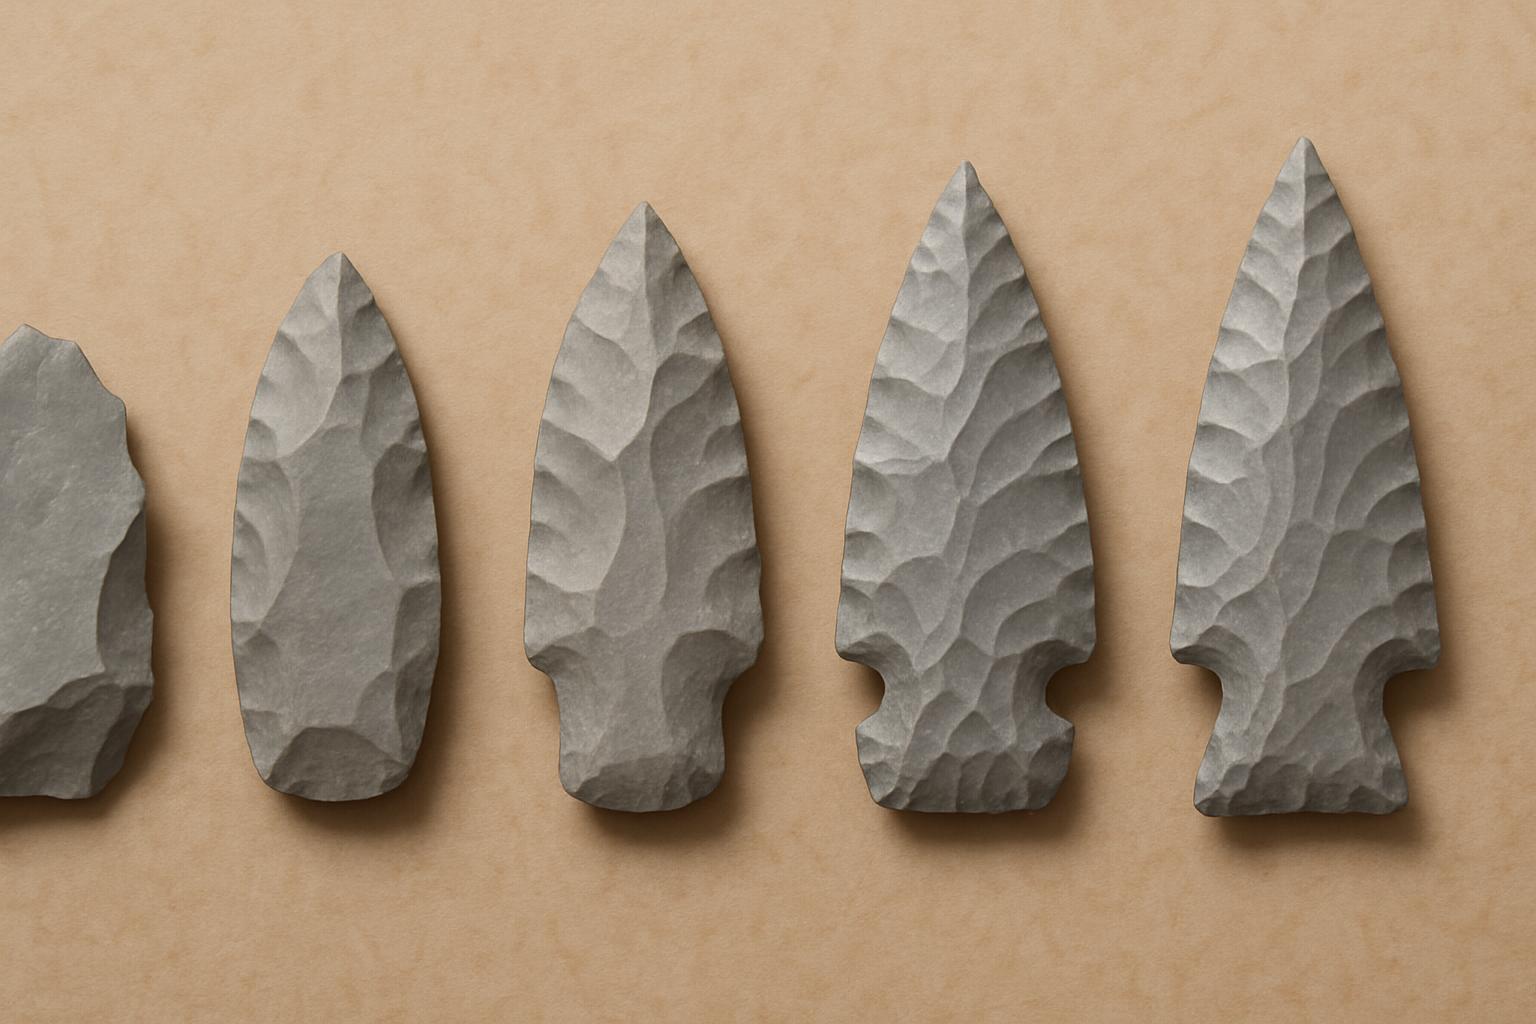
Step-by-step process:
- Start with a prepared flake:
- Select a flake with appropriate thickness and shape
- Ideally, the flake should be roughly the shape of your intended point
- The flake should be thin enough for pressure flaking but thick enough for strength
- Establish the basic shape:
- Use pressure flaking to create the rough outline
- Work from both sides to maintain symmetry
- Focus on creating the general shape before refining details
- Create the point:
- Work carefully on the tip area
- Remove small flakes from alternating sides
- Maintain the centerline of the point for strength
- Test the sharpness carefully as you progress
- Shape the base:
- Decide if you need a straight, concave, or stemmed base
- For a stemmed point, narrow the base with careful pressure flaking
- For a notched point, use a specialized notching tool (small pressure flaker)
- Ensure the base is suitable for your hafting method
- Final edge work:
- Use very light pressure to remove tiny flakes along the edges
- Create a fine, serrated edge if desired
- Ensure edges are even and symmetrical
- Test the cutting ability on plant material
Advanced techniques:
- Notching: Create notches for hafting by using a specialized small pressure flaker
- Serration: Create a serrated edge by removing small, evenly spaced flakes
- Fluting: Remove a channel flake from the base toward the tip (advanced technique)
3. Combination Techniques
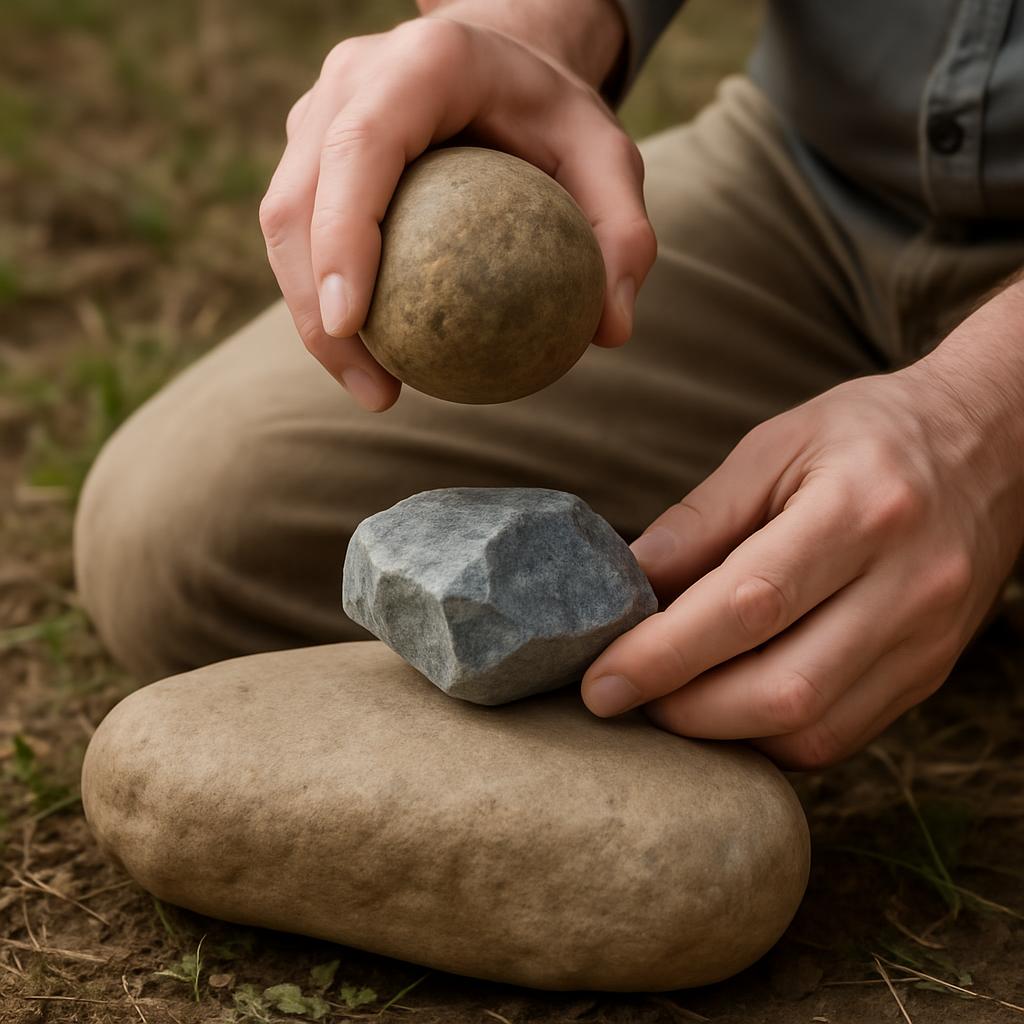
Bipolar Technique
When to use:
- When working with small nodules or pebbles
- When conventional platforms are difficult to establish
- When you need to split a stone into predictable halves
- When working with particularly tough materials
Process:
- Place the stone on a flat anvil stone
- Position the stone so it's stable and won't slip
- Strike the top of the stone directly with your hammerstone
- The force travels through the stone and creates fractures from both ends
- This often splits the stone or removes flakes from both ends
Safety considerations:
- Flakes can fly unpredictably in multiple directions
- Use extra caution to protect your eyes and hands
- The anvil stone can also produce flakes from the impact point
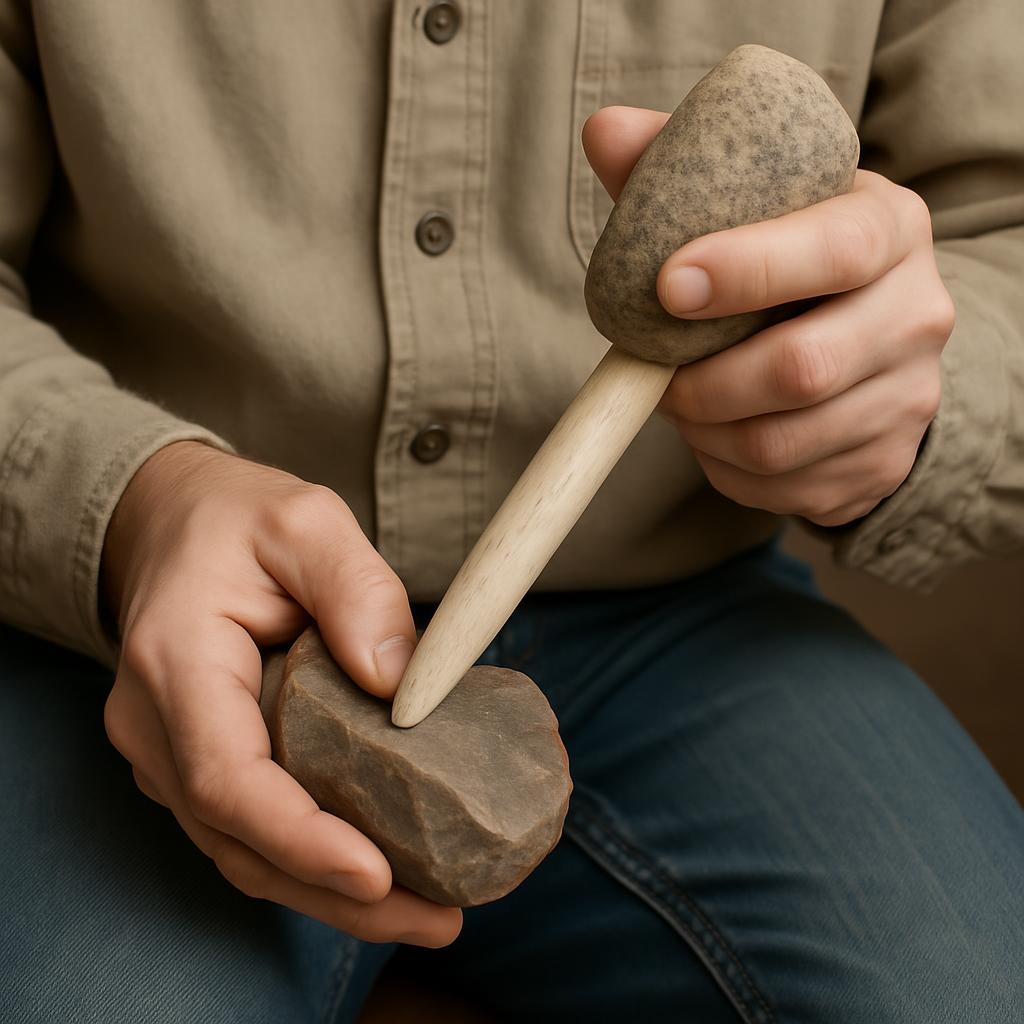
Indirect Percussion
Materials needed:
- Core stone
- Hammerstone
- Punch (antler, bone, or hardwood)
Process:
- Hold the core stone firmly or brace it against your leg
- Position the punch on the exact spot where you want to initiate the flake
- Hold the punch steady with one hand
- Strike the end of the punch with your hammerstone
- The force transfers through the punch to a precise point on the core
Advantages:
- Allows for more precise control than direct percussion
- Creates longer, more parallel-sided flakes
- Enables work in areas difficult to reach with direct percussion
- Bridges the gap between percussion and pressure techniques
4. Tool Maintenance and Resharpening
Edge Maintenance

Recognizing dull edges:
- Edge appears rounded under close inspection
- Tool requires more force to perform its function
- Cutting becomes tearing rather than slicing
- Edge may show small chips or damage
Basic resharpening:
- Examine the edge to identify dull or damaged sections
- Use pressure flaking to remove small flakes along the edge
- Work from both sides to maintain the edge angle
- For heavily damaged edges, use light percussion to rejuvenate
- Test the edge periodically during resharpening
Extending tool life:
- Rotate which sections of the edge you use for different tasks
- Store tools properly to prevent edge damage
- Use tools for their intended purpose to prevent breakage
- Recognize when a tool should be recycled into a different form
Tool Recycling
Common recycling paths:
- Broken hand axe → scraper
- Broken knife → drill or awl
- Dulled scraper → burin (engraving tool)
- Large flake waste → small cutting tools
- Exhausted core → hammerstone
Recycling process:
- Assess the remaining material for potential new uses
- Identify the least modification needed to create a functional tool
- Use appropriate flaking technique to reshape the tool
- Focus on creating one good working edge or point
- Test the recycled tool for its new purpose
Resource efficiency:
- Collect and save all flakes larger than your thumbnail
- Organize flakes by size and potential use
- Store particularly fine material for future specialized tools
- Use lower quality materials for practice and skill development
5. Common Problems and Solutions
Troubleshooting Guide
Problem: Stone breaks unpredictably
- Possible causes:
- Internal flaws or cracks in the stone
- Improper support while striking
- Too much force applied
- Solutions:
- Test stones by tapping lightly and listening for solid ring
- Ensure proper support of the core stone
- Start with lighter strikes and increase force gradually
- Soak stone in water before working to reveal hidden cracks
Problem: Flakes are too short or hinged
- Possible causes:
- Platform angle too steep
- Insufficient force
- Strike too far from edge
- Solutions:
- Adjust platform to approximately 45-60°
- Strike closer to the edge (about 3-5mm)
- Increase force slightly
- Try striking from a different direction
Problem: Pressure flaking not removing flakes
- Possible causes:
- Edge angle too obtuse
- Insufficient pressure
- Pressure flaker too blunt or sharp
- Edge not properly prepared
- Solutions:
- Thin the edge with percussion flaking first
- Prepare the edge by grinding slightly to strengthen it
- Reshape the pressure flaker tip
- Brace the pressure flaker against your body for more force
Problem: Asymmetrical tools
- Possible causes:
- Working too much on one side
- Inconsistent flake removal
- Starting with asymmetrical blank
- Solutions:
- Work systematically, alternating sides
- Frequently check symmetry from multiple angles
- Use a mental centerline as reference
- Remove material from the thicker side to balance
Conclusion
Mastering stone tool creation is a fundamental skill that opens the door to all other technologies. The techniques of percussion and pressure flaking allow you to create a diverse toolkit for survival and advancement. Remember that stone tool making is both a science and an art - it requires understanding of material properties and mechanics, but also develops through practice and intuition.
As you develop your skills, you'll find that you can create increasingly sophisticated and specialized tools. Each stone has unique properties, and learning to "read" these properties is key to successful tool making. Start with simple tools and gradually work toward more complex forms as your skills improve.
The principles learned in basic stone tool creation - understanding material properties, applying force effectively, and shaping materials to purpose - form the foundation for all future technological development.